

Hello everyone – it has been a while since my last review, however I’m hoping to get some new products to review and share with you all. If you have been keeping an eye on Nitecore, they have released some amazing new gear, with more releases planned. For this review, I have the Nitecore P18 Tactical Flashlight that was released earlier this year. So, what sets this flashlight apart from others in the current market? Let’s find out…
How Does the P18 Arrive?
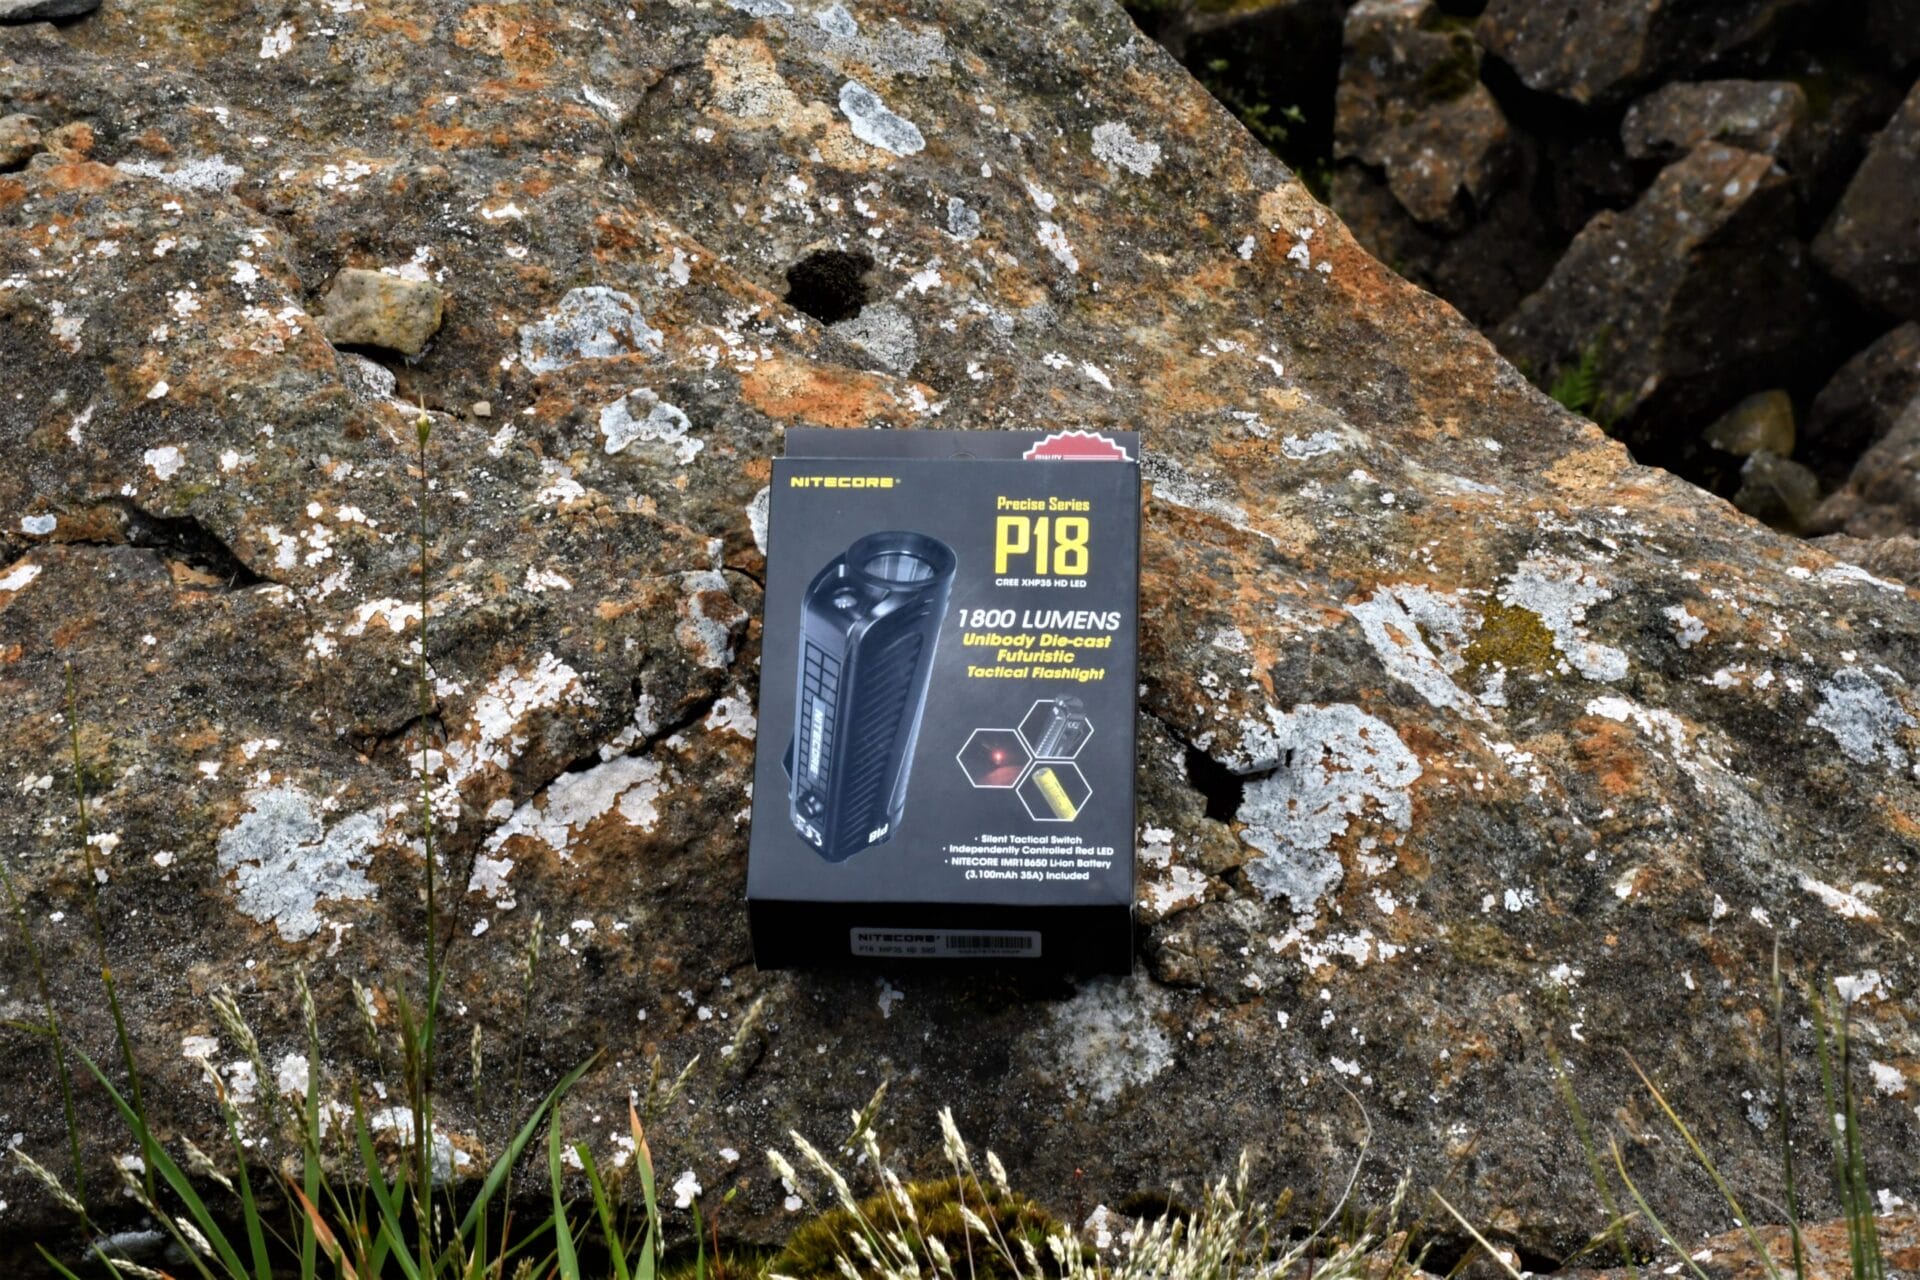
The Nitecore P18 flashlight comes in a box that features images of the P18, as well as technical information. The box is similar to that of the Nitecore LR12 (read my review of the LR12 here), in terms of layout and design. Many people judge a product by its packaging, and the box used for the P18 definitely makes a good impression.
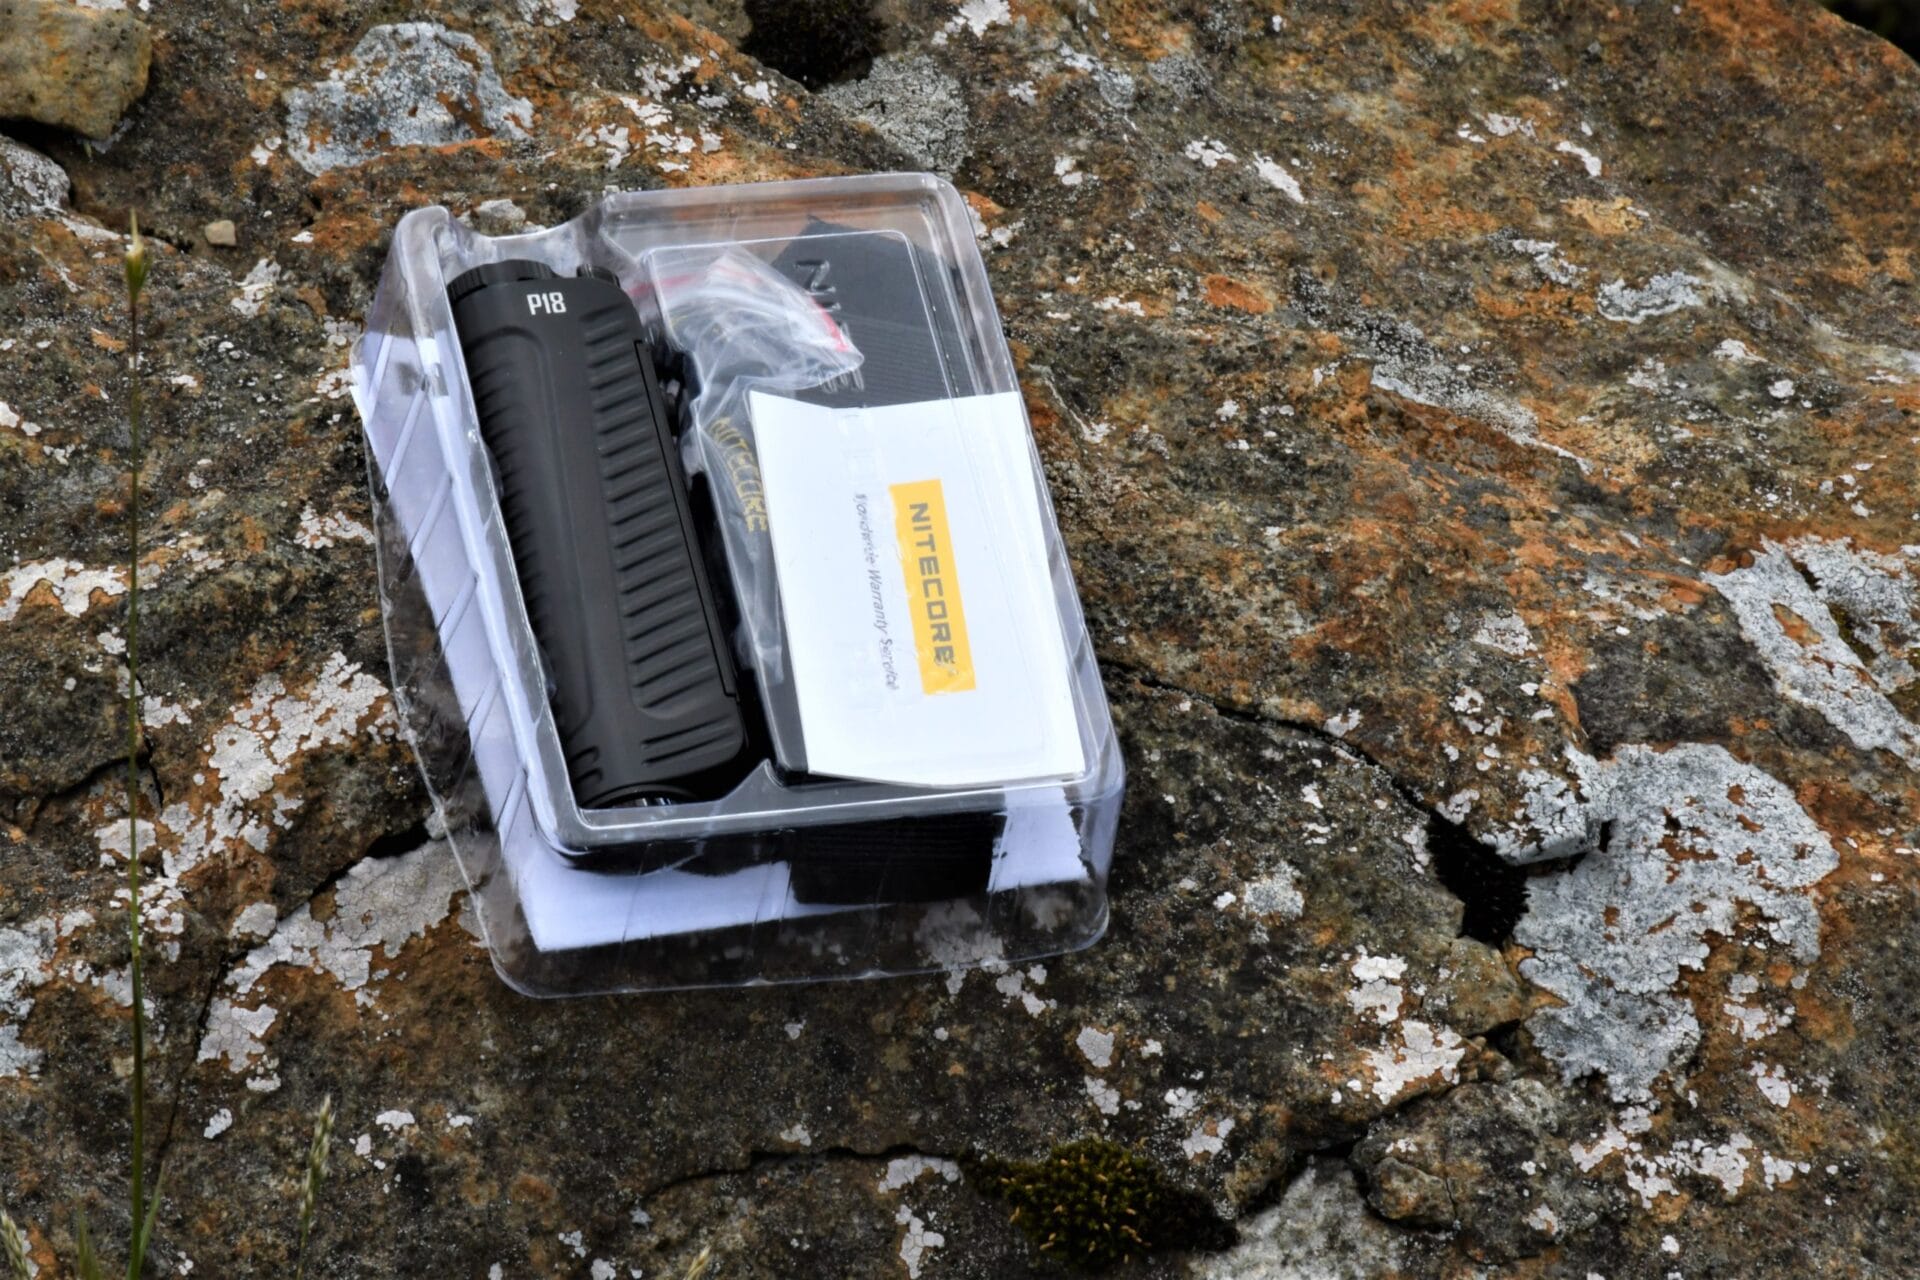
Now, what actually comes with the P18? Upon opening the box, the flashlight is sitting in a rigid plastic insert, which protects it from being damaged while in transit. Inside, you receive:
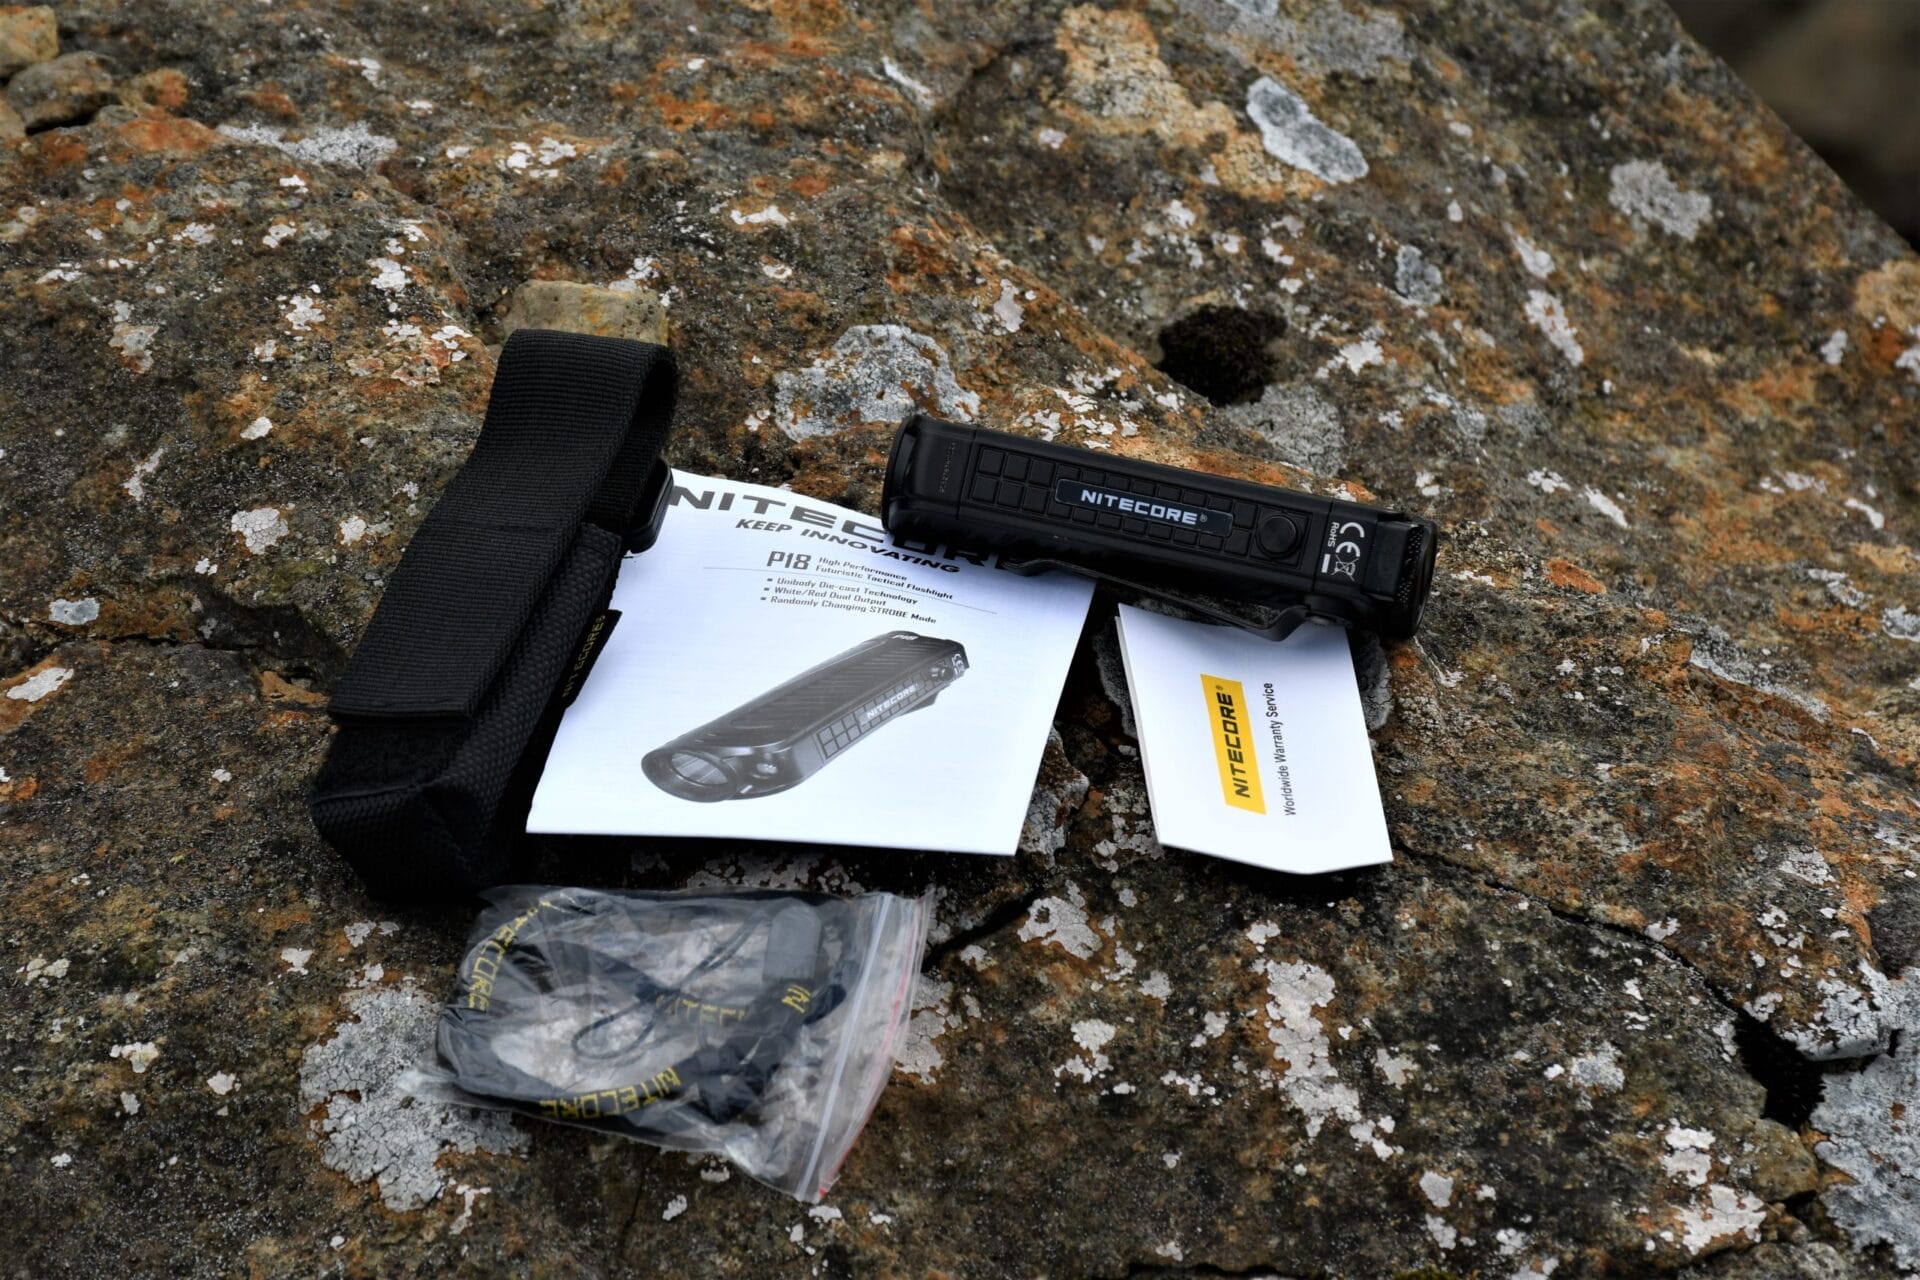
- Multi-lingual instruction manual
- Heavy-duty nylon holster
- Warranty card
- Spare O-rings
- Nitecore lanyard (adjustable)
- IMR18650 lithium ion flat top battery (3,100 mAh capacity) (35A)
- Nitecore P18 flashlight
First Impressions of the P18.
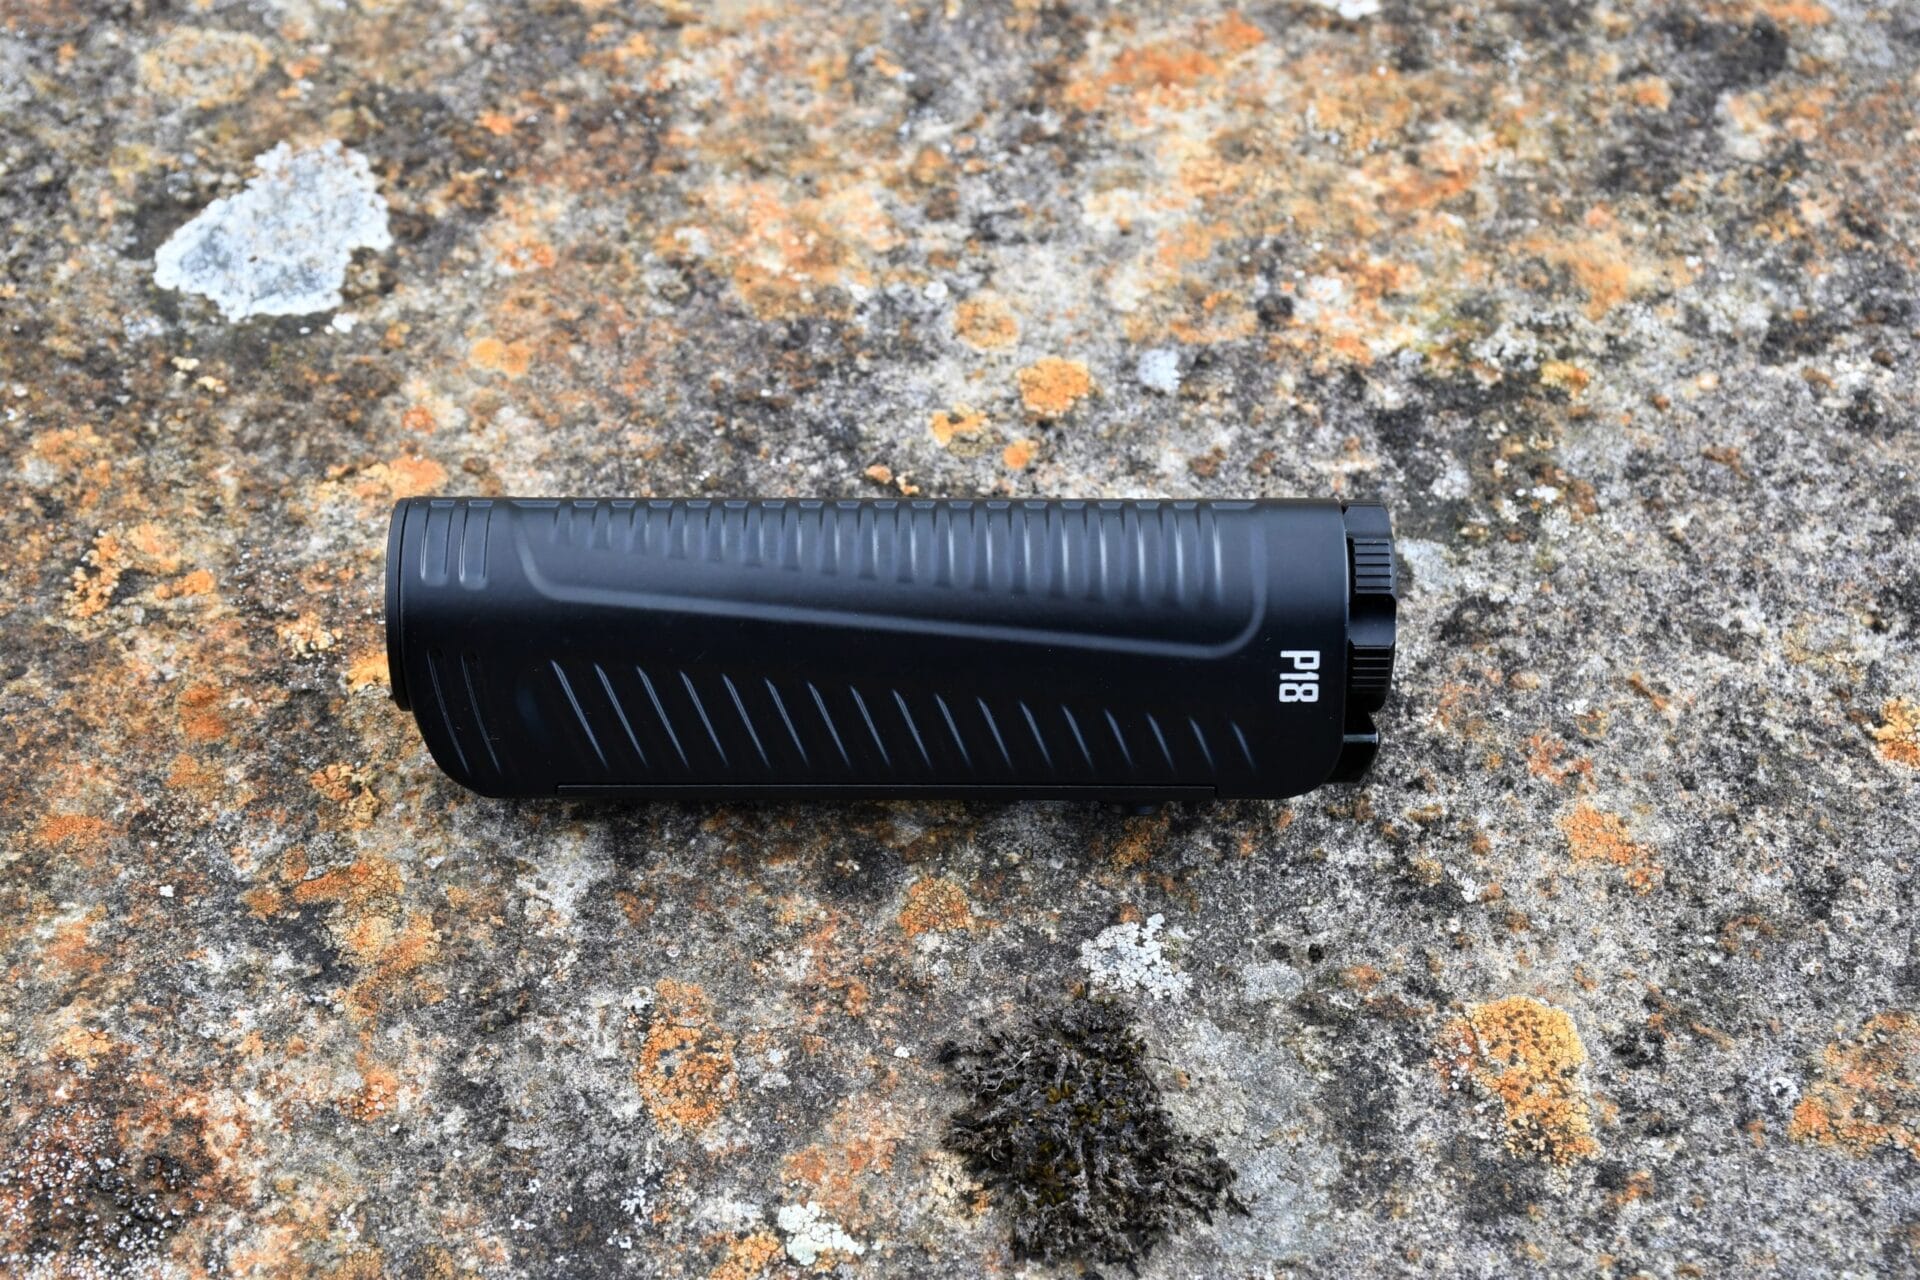
Upon removing the Nitecore P18 from its box, it is clear that you are holding a well-made product in your hand. All though it is on the small side, it feels solid.
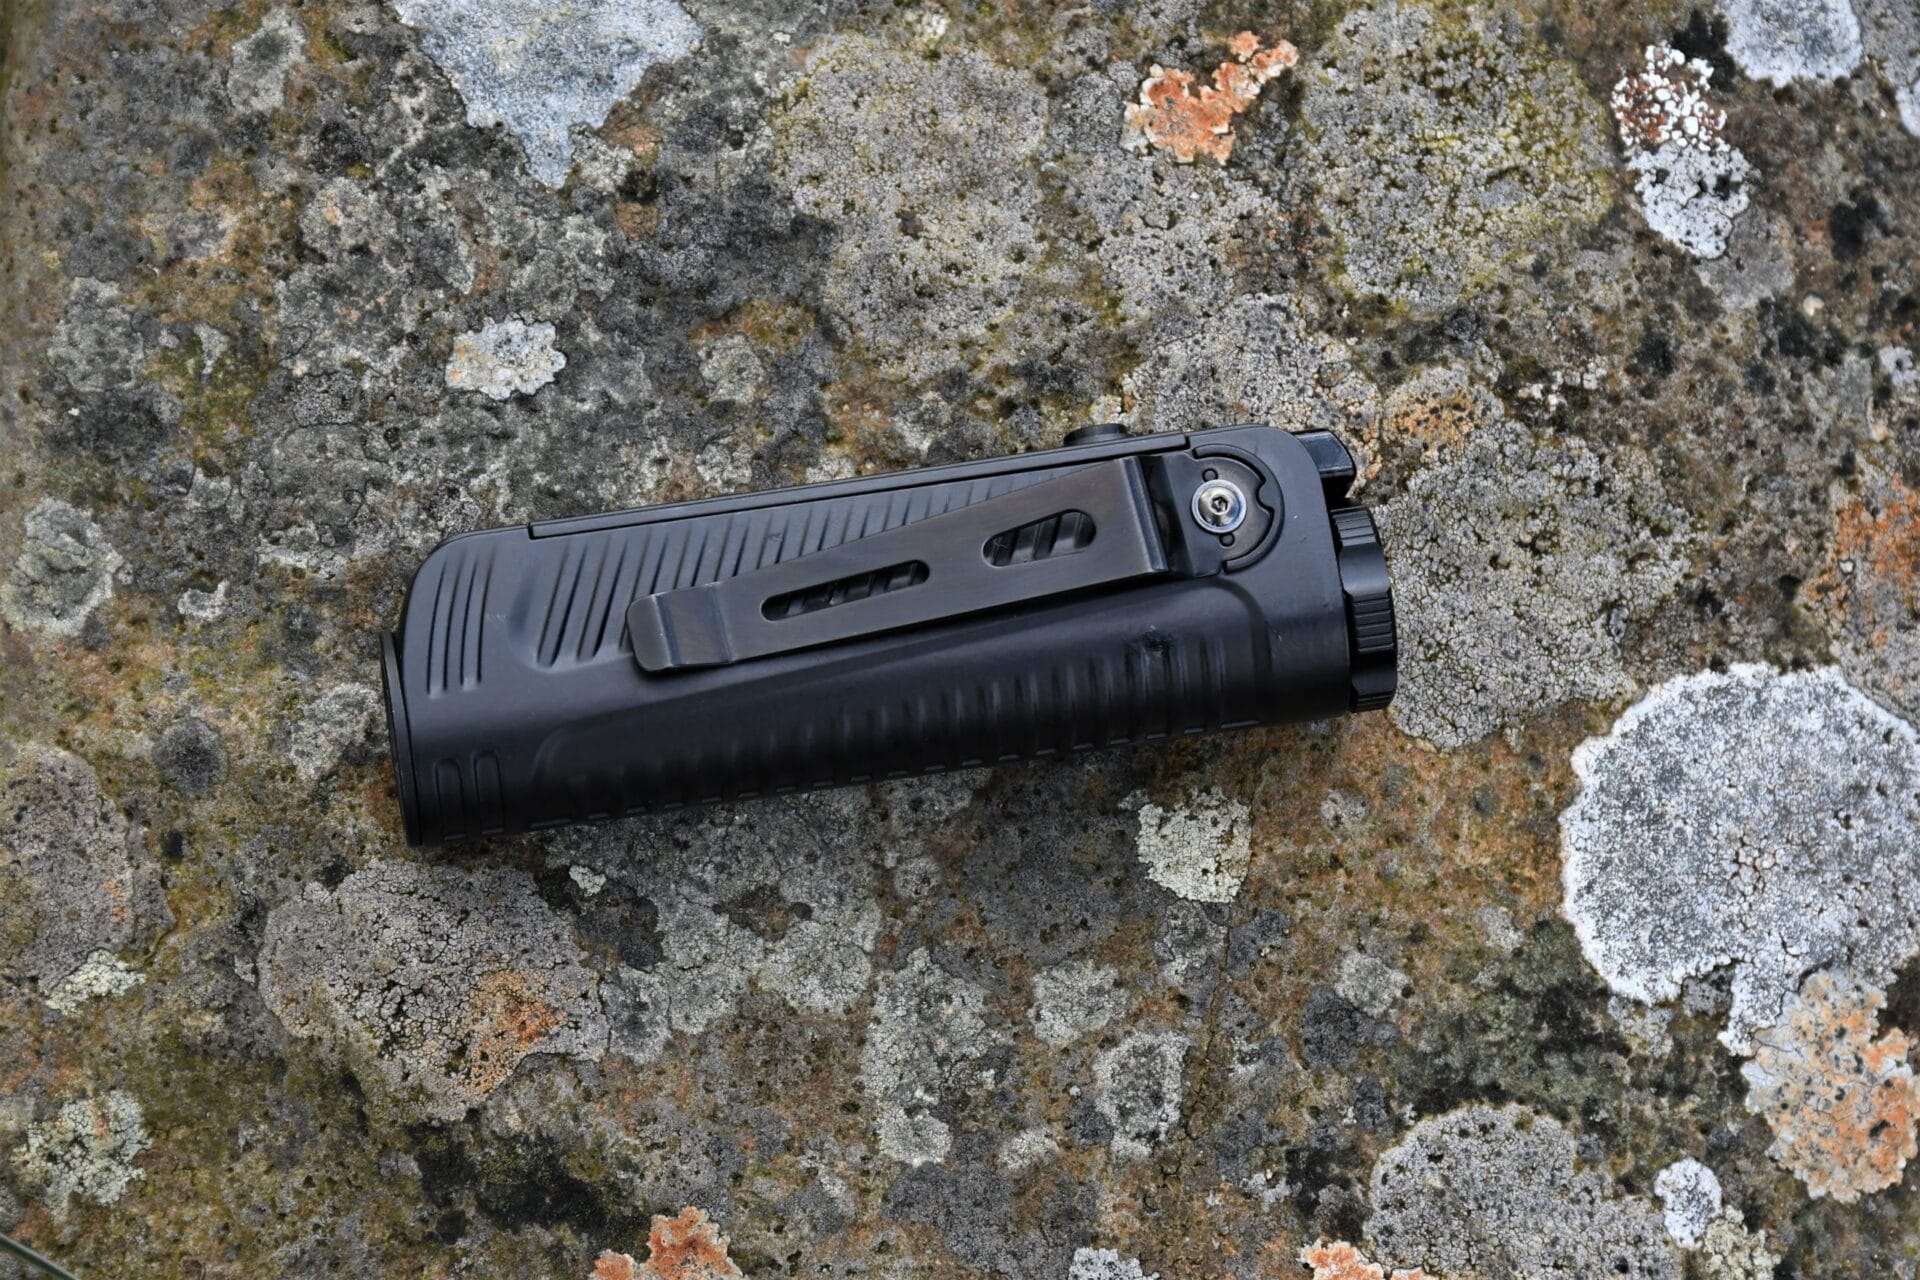
The pocket clip feels sturdy and it has a very low profile, with no rough parts. This will prevent it from snagging.
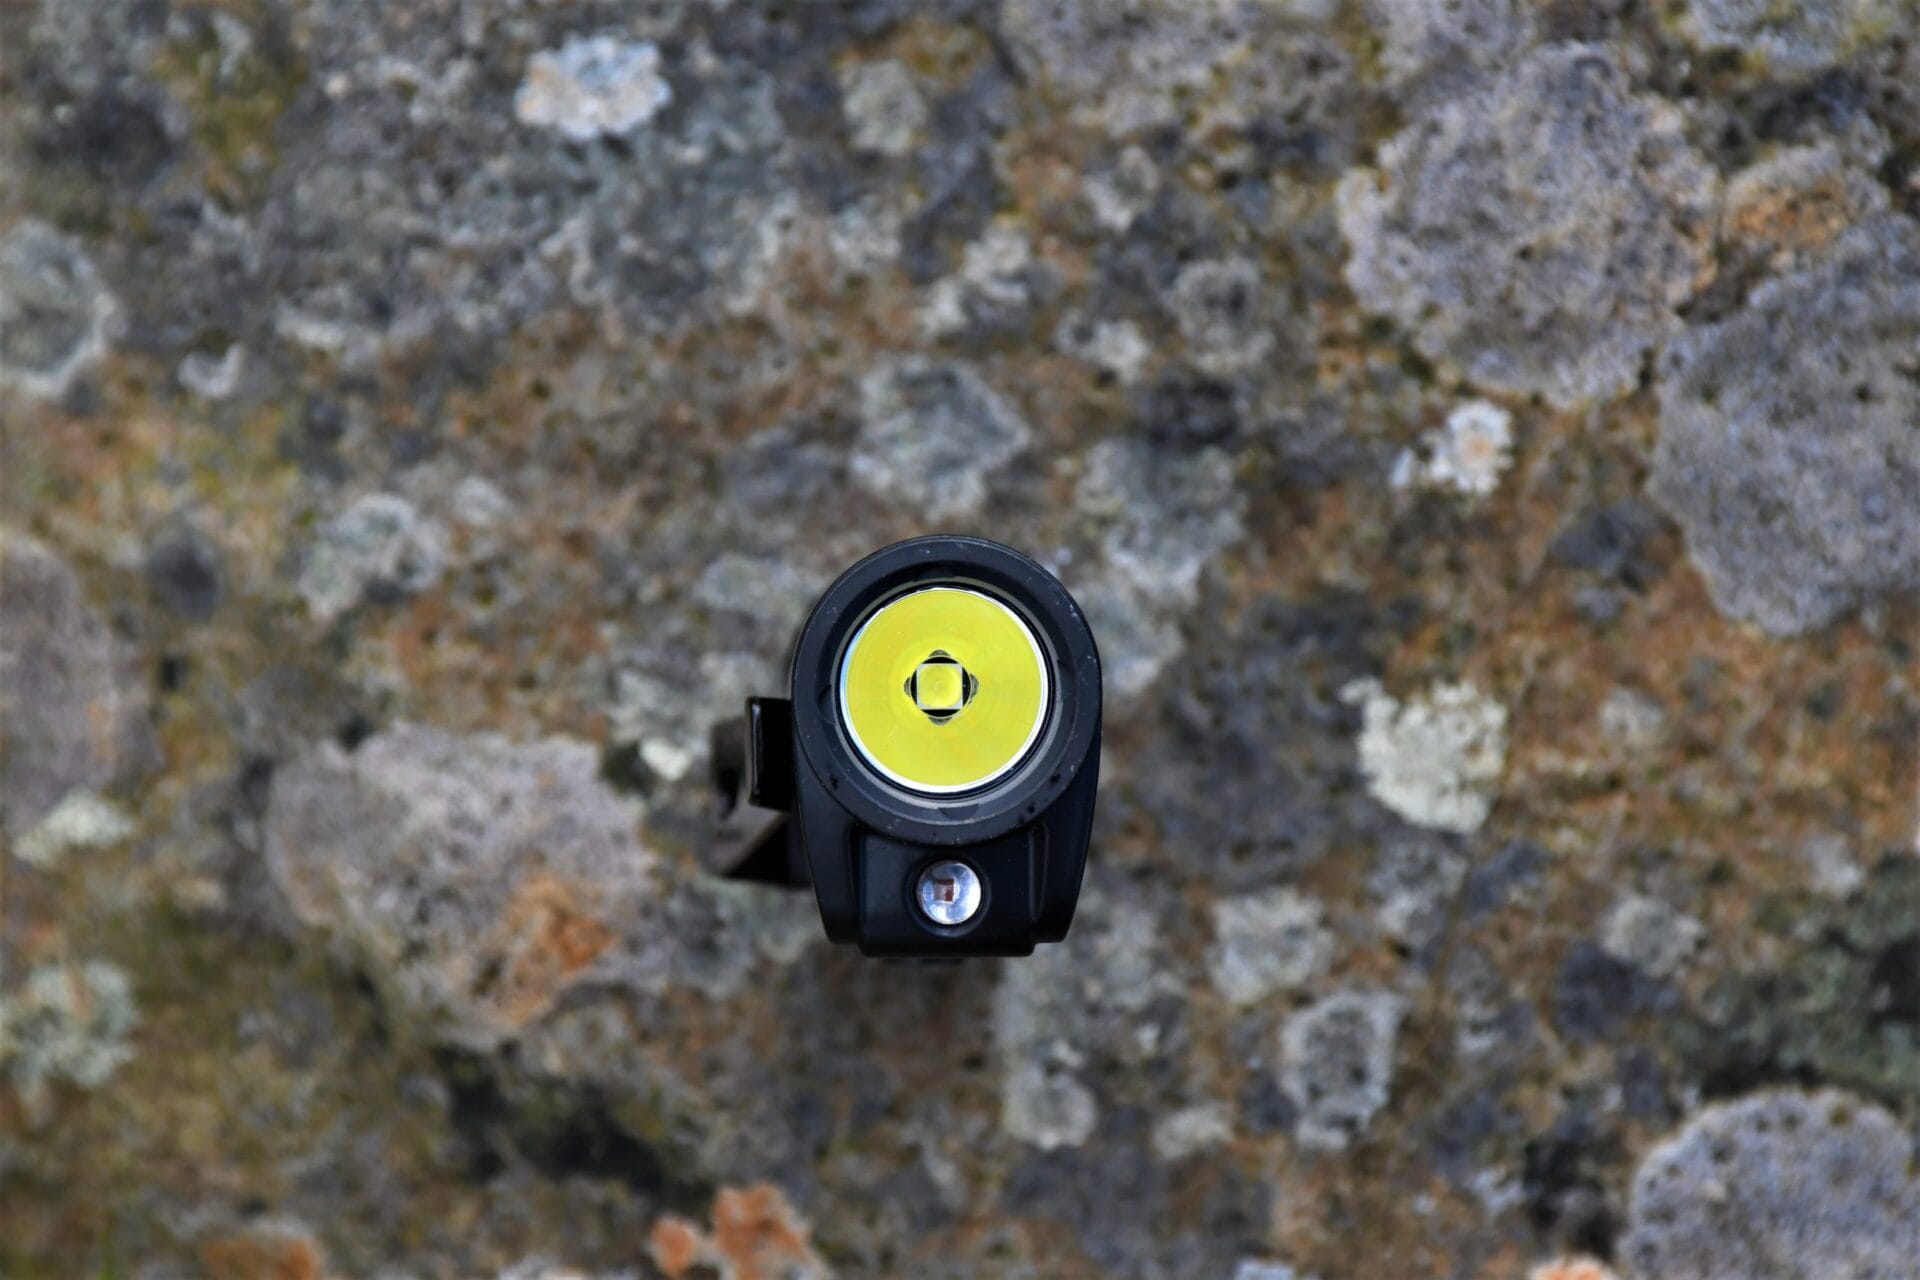
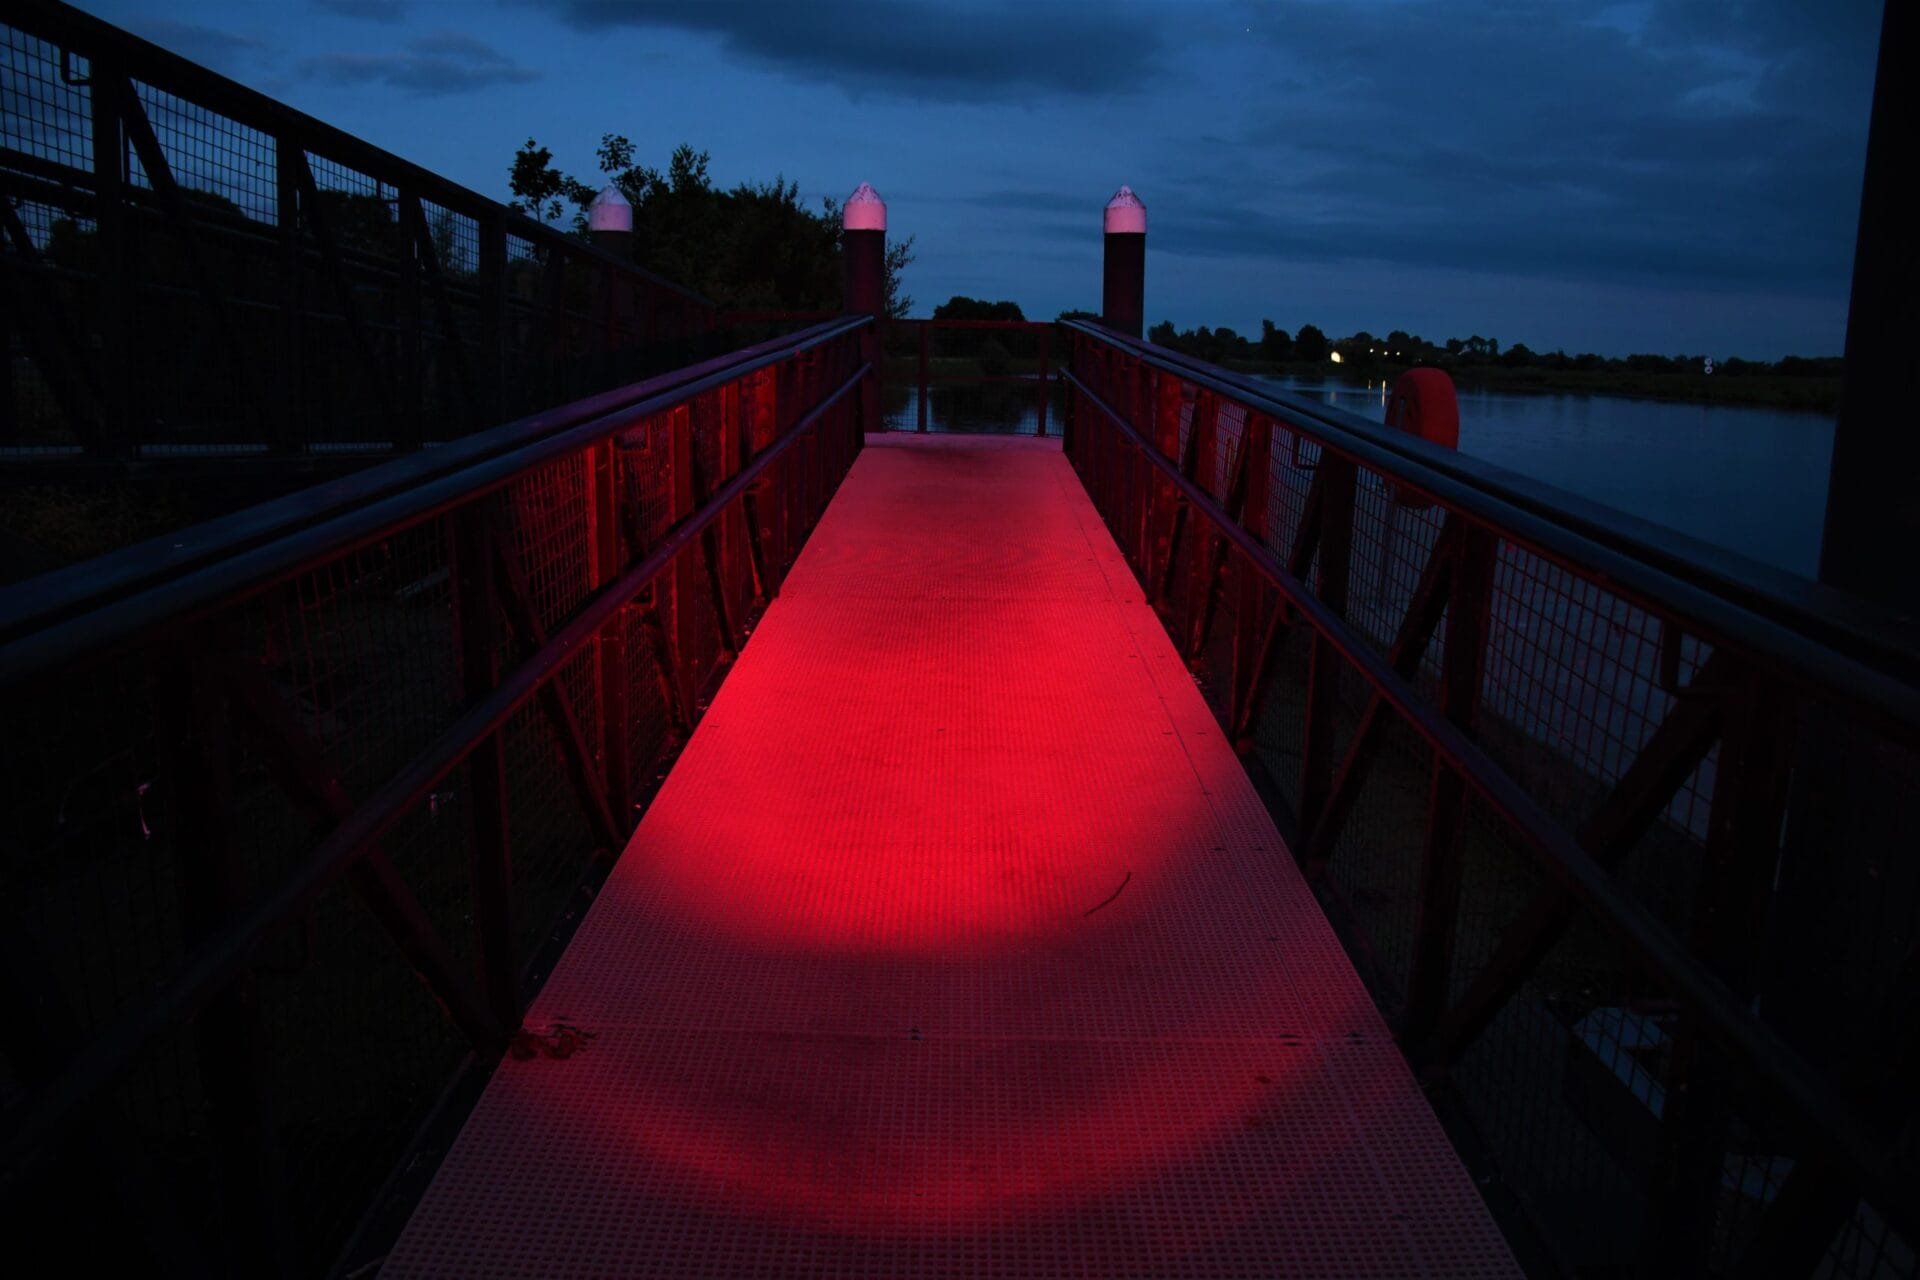
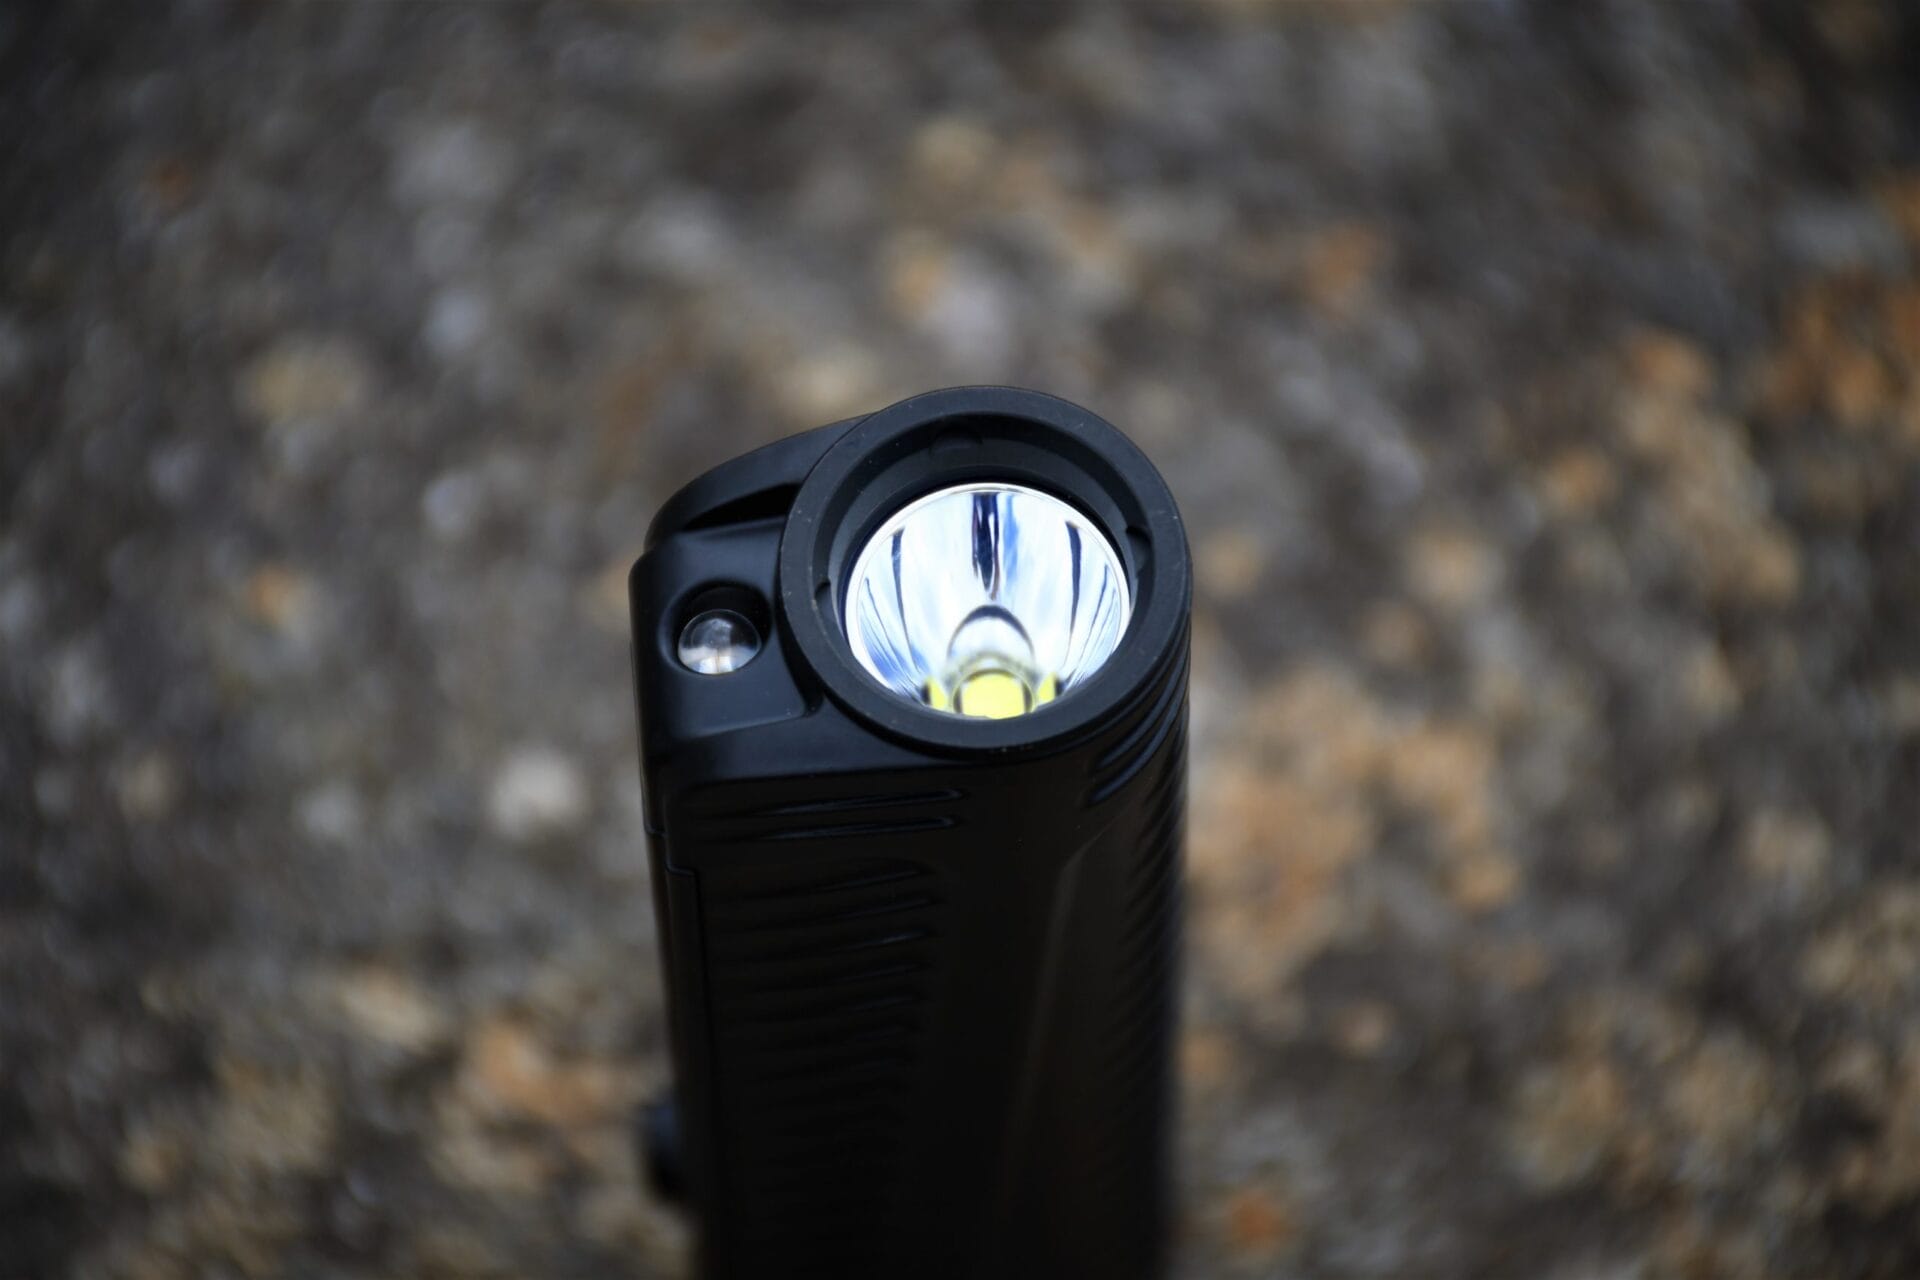
What catches my attention the most is the fact that there is a small LED below the head that houses the CREE XHP35 HD (high-density) LED. The secondary LED is activated by pressing the side switch.

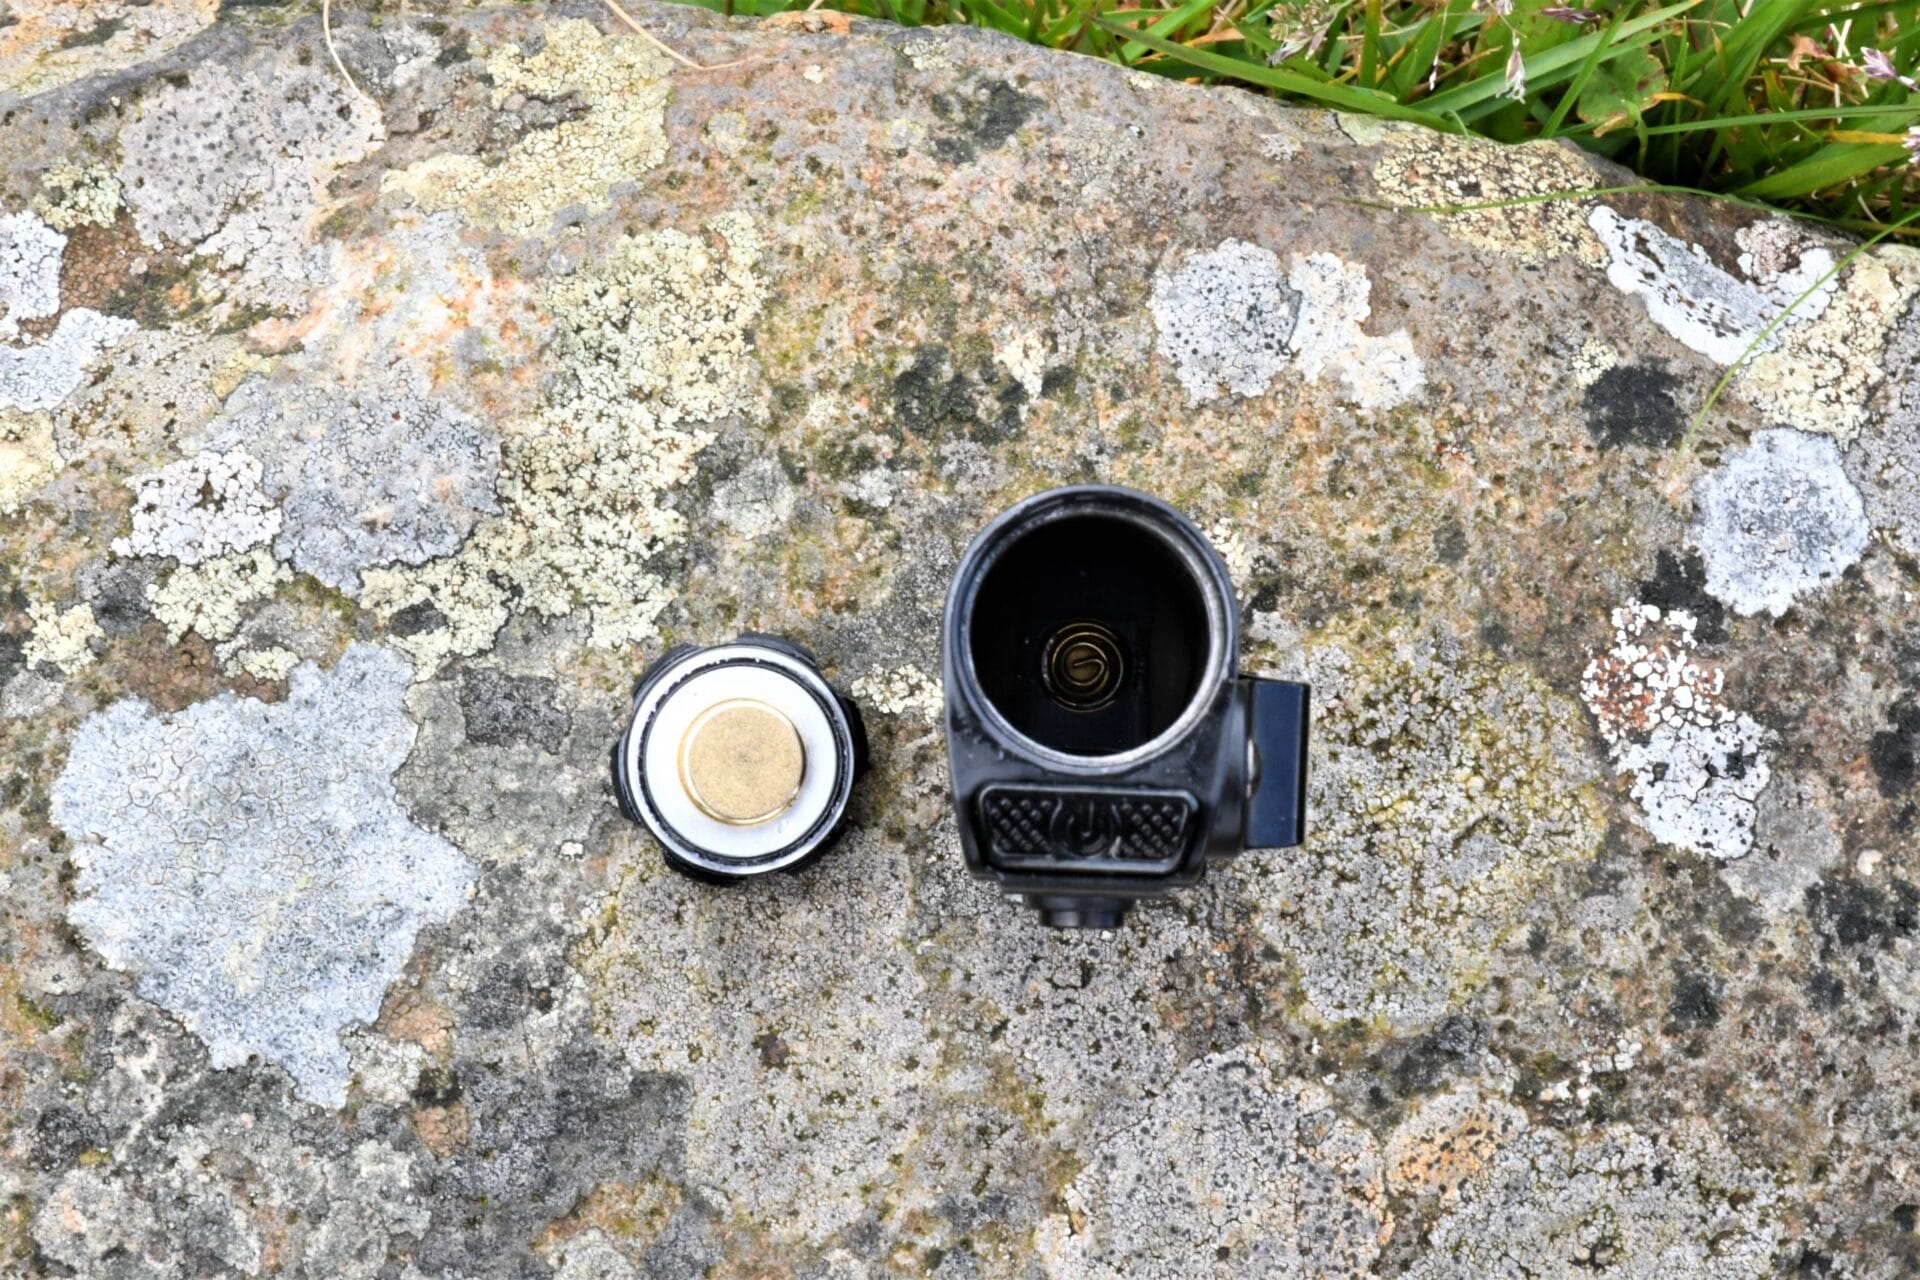
When the P18 arrives, there is a little white plastic disk that needs to be removed, as this prevents the P18 from switching on during transit by preventing the flow of electricity between the battery and the circuit. Both the red LED and the main LED can be switched on at the same.
Features and Details.
Earlier in my review, I said that I would be shining a light on what makes this flashlight different. There are two key things:
- the auxiliary red LED
- the main switch
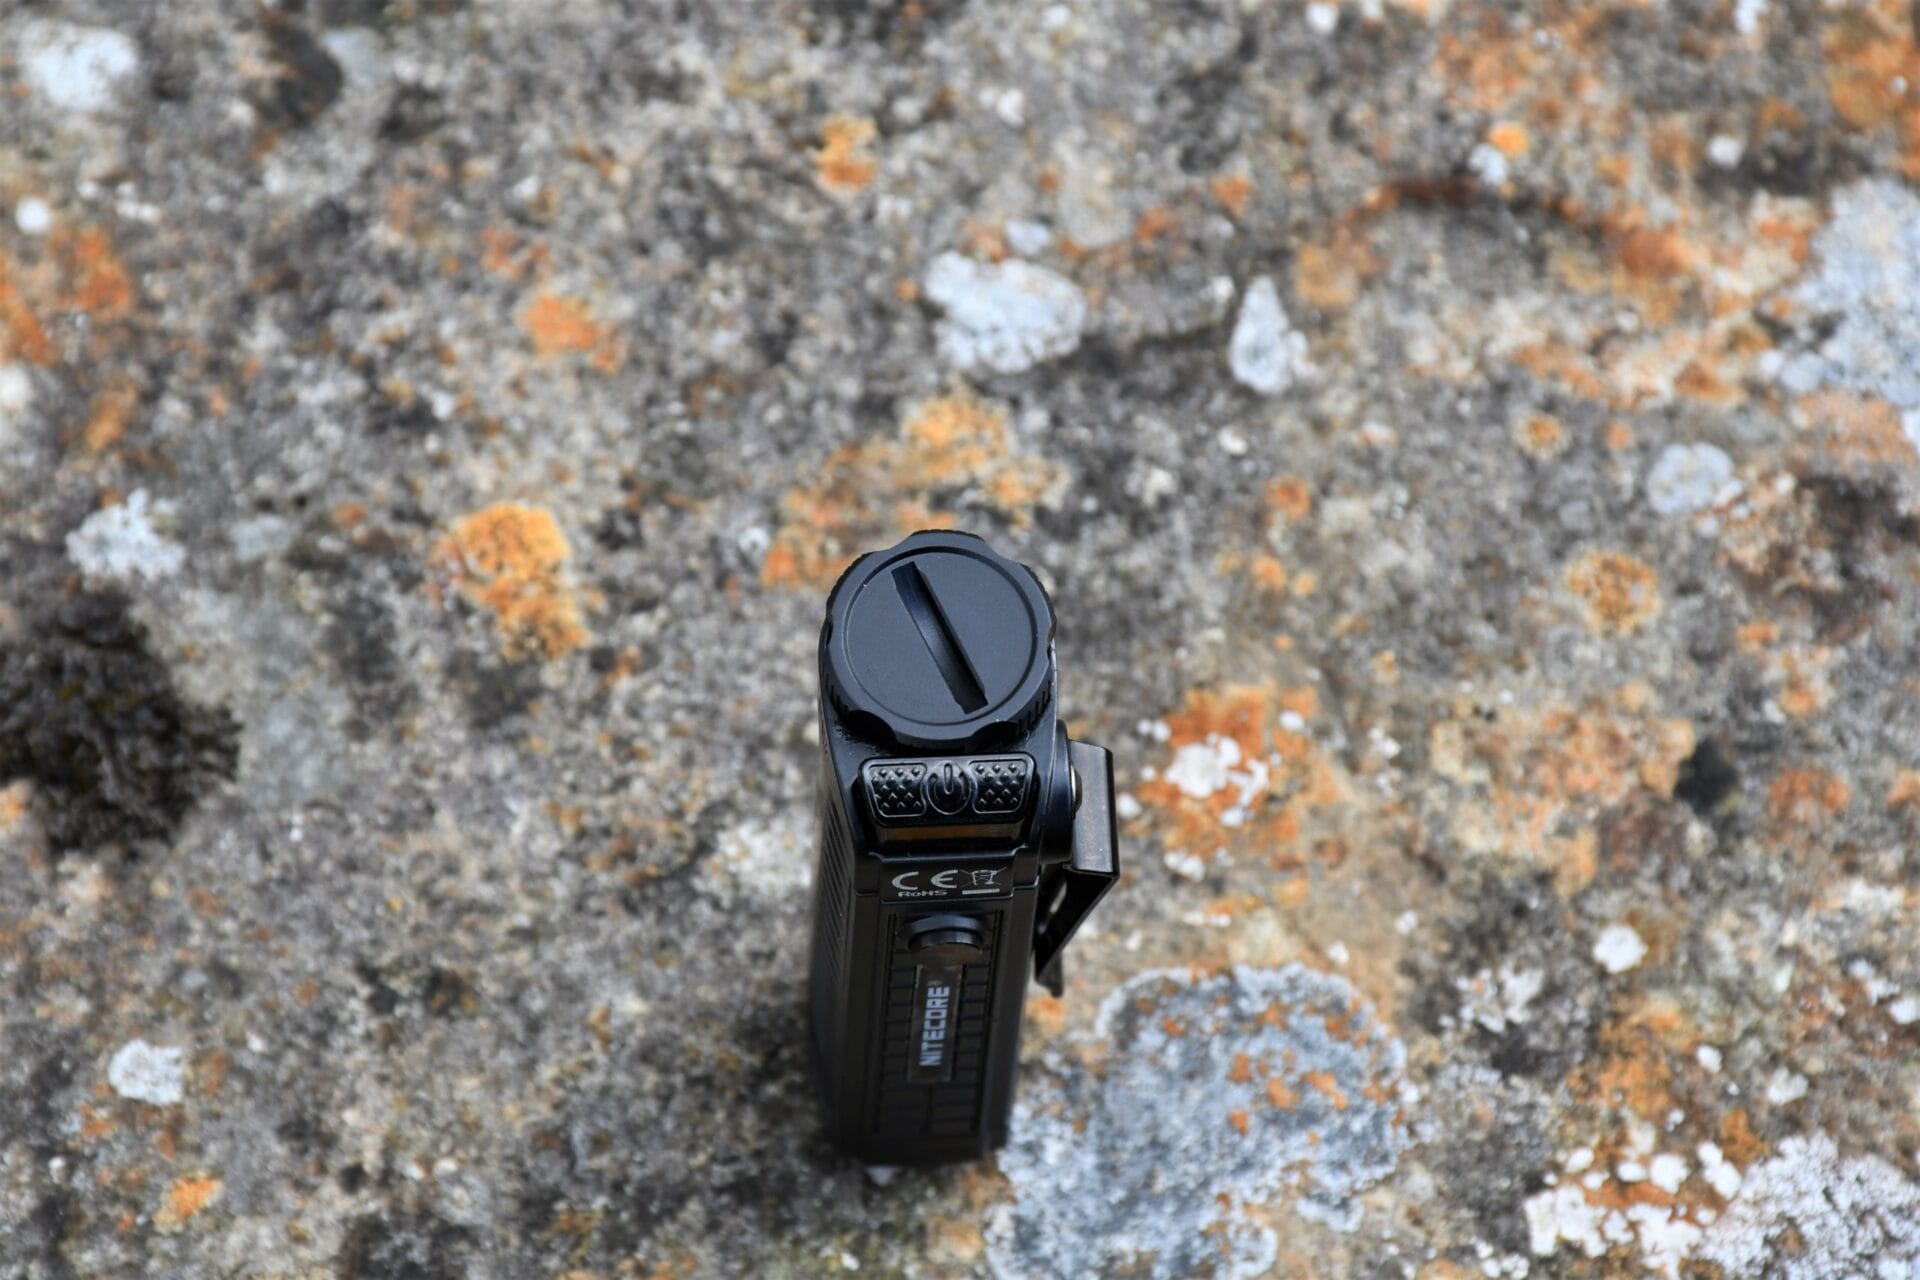
What makes the switch so special is the fact that it is SILENT. When you press it, no clicking can be heard. This is what sets the P18 apart. This can be useful, especially when you are trying to be as quiet as possible (for example, law enforcement operations). It can take a bit of time to get used to controlling the P18 via this switch, as well as the UI. However, once you practice once or twice with the switch, it becomes second nature.
A Closer Look.
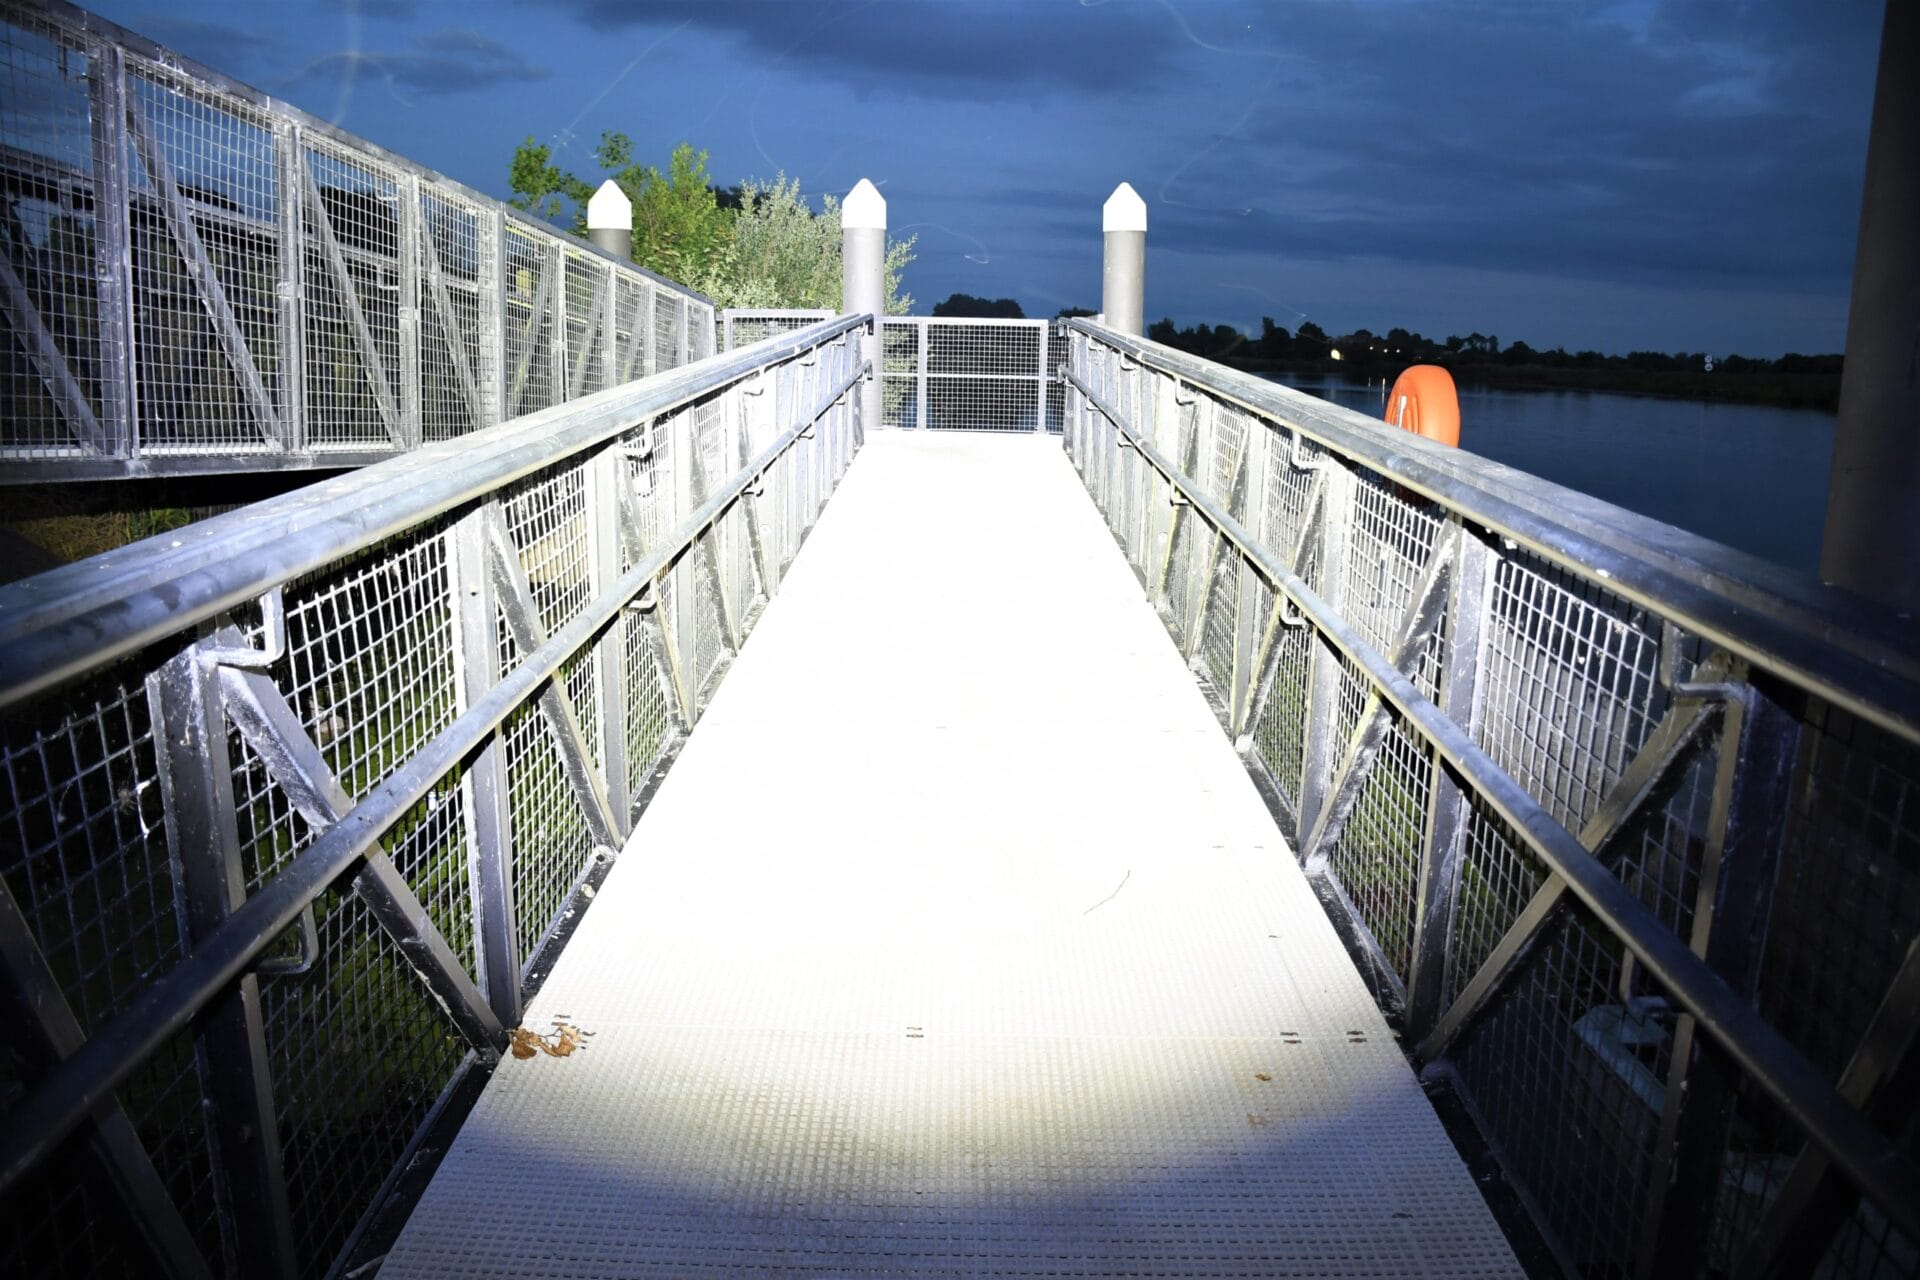
The Nitecore P18 features an IP5-6 rating, which means that it is protected against the ingression of harmful dust particles and also waterproof against powerful jets of water. Featuring a drop resistance of one metre, the P18 can take a beating! As I previously mentioned, the flashlight utilises a CREE XHP35 HD (high-density) LED nestled in a smooth reflector, which is coated. Due to the compact nature of the P18, the reflector isn’t very deep, which reduces the throw of the flashlight, but don’t let that put you off! 1,800 lumens in a dark environment is a force to be reckoned with! Below, you can find a table with various information.
| FL1 standard | Ultralow | Low | Mid | High | Turbo | Special modes (strobe, S.O.S. or beacon) | Auxiliary red LED light |
| Output (lumens) | 1 | 65 | 260 | 850 | 1,800 | 1,800 | 10 |
| Run time | 220 hours | 18 hours | 4 hours | 2 hours | 30 minutes | – | 28 hours |
| Beam throw (metres) | 6 | 37 | 73 | 135 | 182 | – | 10 |
| Beam intensity (candelas) | 9 | 350 | 1,350 | 4,600 | 8,360 | – | 25 |
The beam has a cool white tint and is very floody. The frequency of the strobe changes at random, which makes the effects even more disorientating. Due the compact size of the P18, churning out 1,800 lumens for an extended period of time can cause the flashlight to heat up. However, thanks to the ATR (advanced temperature regulation regulates the output (by stepping it down if necessary), which allows the P18 to adjust to the working condition and ambient environment. This ensures that the delicate electronic components are not damaged by an excessive build-up of heat.
The UI of the P18.
This is probably one of the trickiest things to get your head around at the start. When the light is:
- Off: press the tail switch in fully to turn on the light
- On: press the tail switch in fully to turn off the light
- On: half-press the tail switch to cycle between the modes
- Off: press both the tail switch and the side switch to access ultralow
- On: press and hold the tail switch in fully to access turbo instantly (releasing it will take you back to your previous output)
To access the red auxiliary light, when the P18 is:
- Off: long press the side switch to turn on the auxiliary red light
- On: short or long press the side switch to turn of the red light
When in standby status, holding in the side switch for three seconds will switch on the auxiliary red light, before flashing to indicate the battery voltage remaining. For example, three flashes followed by a short pause, then another seven flashes will indicate that there is 3.7V remaining. For one 18650 battery:
- 3.5V and below is low
- 3.7V – 3.9V is fine
- 4.2V is full power
For two CR123 batteries:
- 4.8V and below is low
- 5.6V – 6.0V is fine
- 6.4V is full power
The red LED is great for night time activities, as it conserves your night vision. This LED makes reading maps easy, as there is more than enough light to see clearly.
Ergonomics.
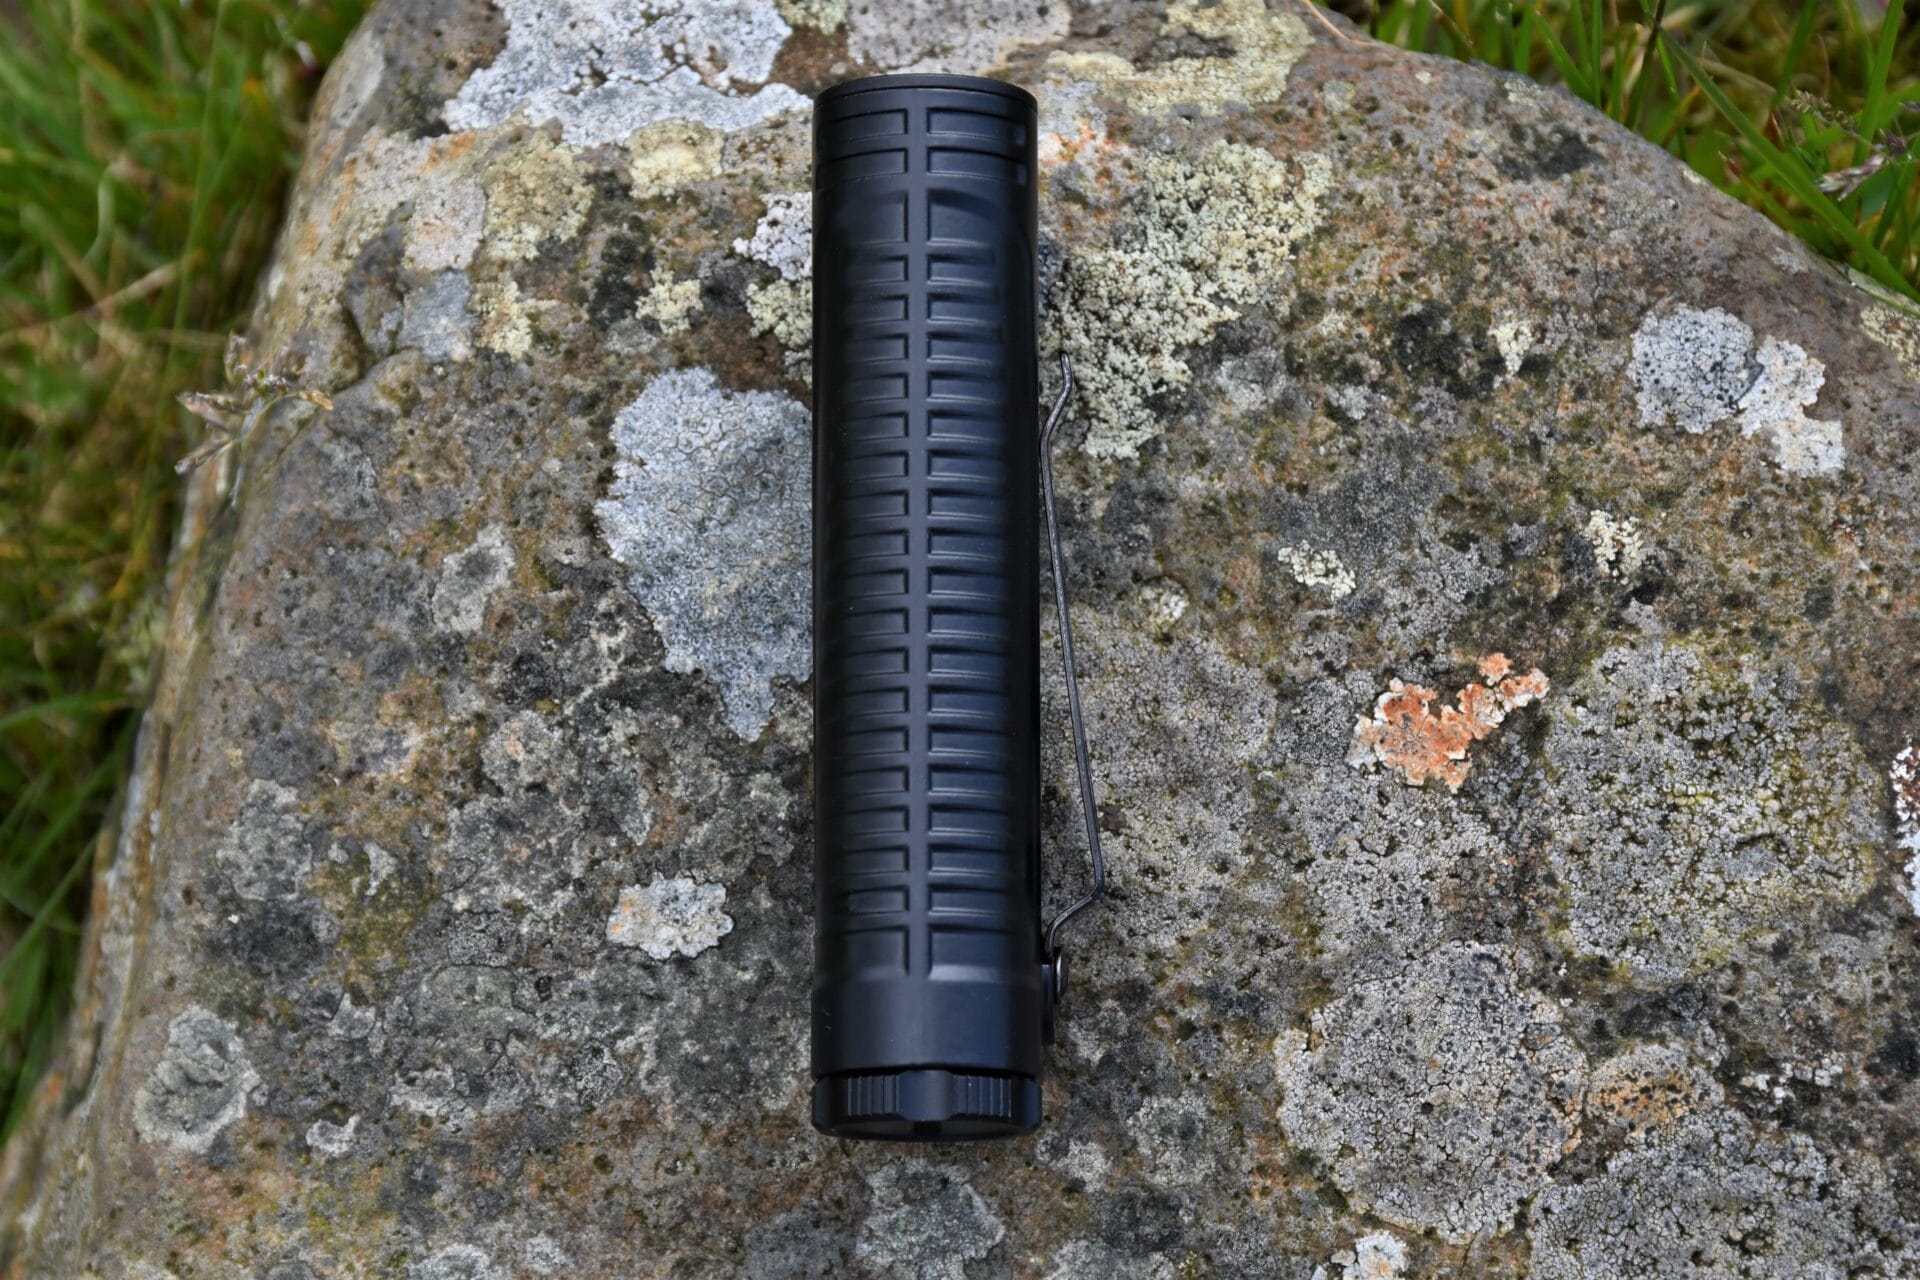
The P18 reminds me of a pocket knife because of the way it looks. The pocket clip adds to this look. I love how the flashlight feels in the hand, even when wearing gloves. The main switch is easy to access, as is the side switch. The body features a lovely matte-black coating – the aluminium has been anodised, which protects it against minor scratches and scrapes. The P18 features many non-slip grooves, which allows you to get a good grip of the body. Thanks to the design, the moisture will run through the grooves and drip off, which means that even in wet conditions, your grip will not be compromised.
The body is one whole piece, manufactured via a process known as “die casting”. This is advantageous, as die casting produces parts that are durable, while maintaining close tolerances. Die cast parts are stronger than plastic injection mouldings having the same dimensions.
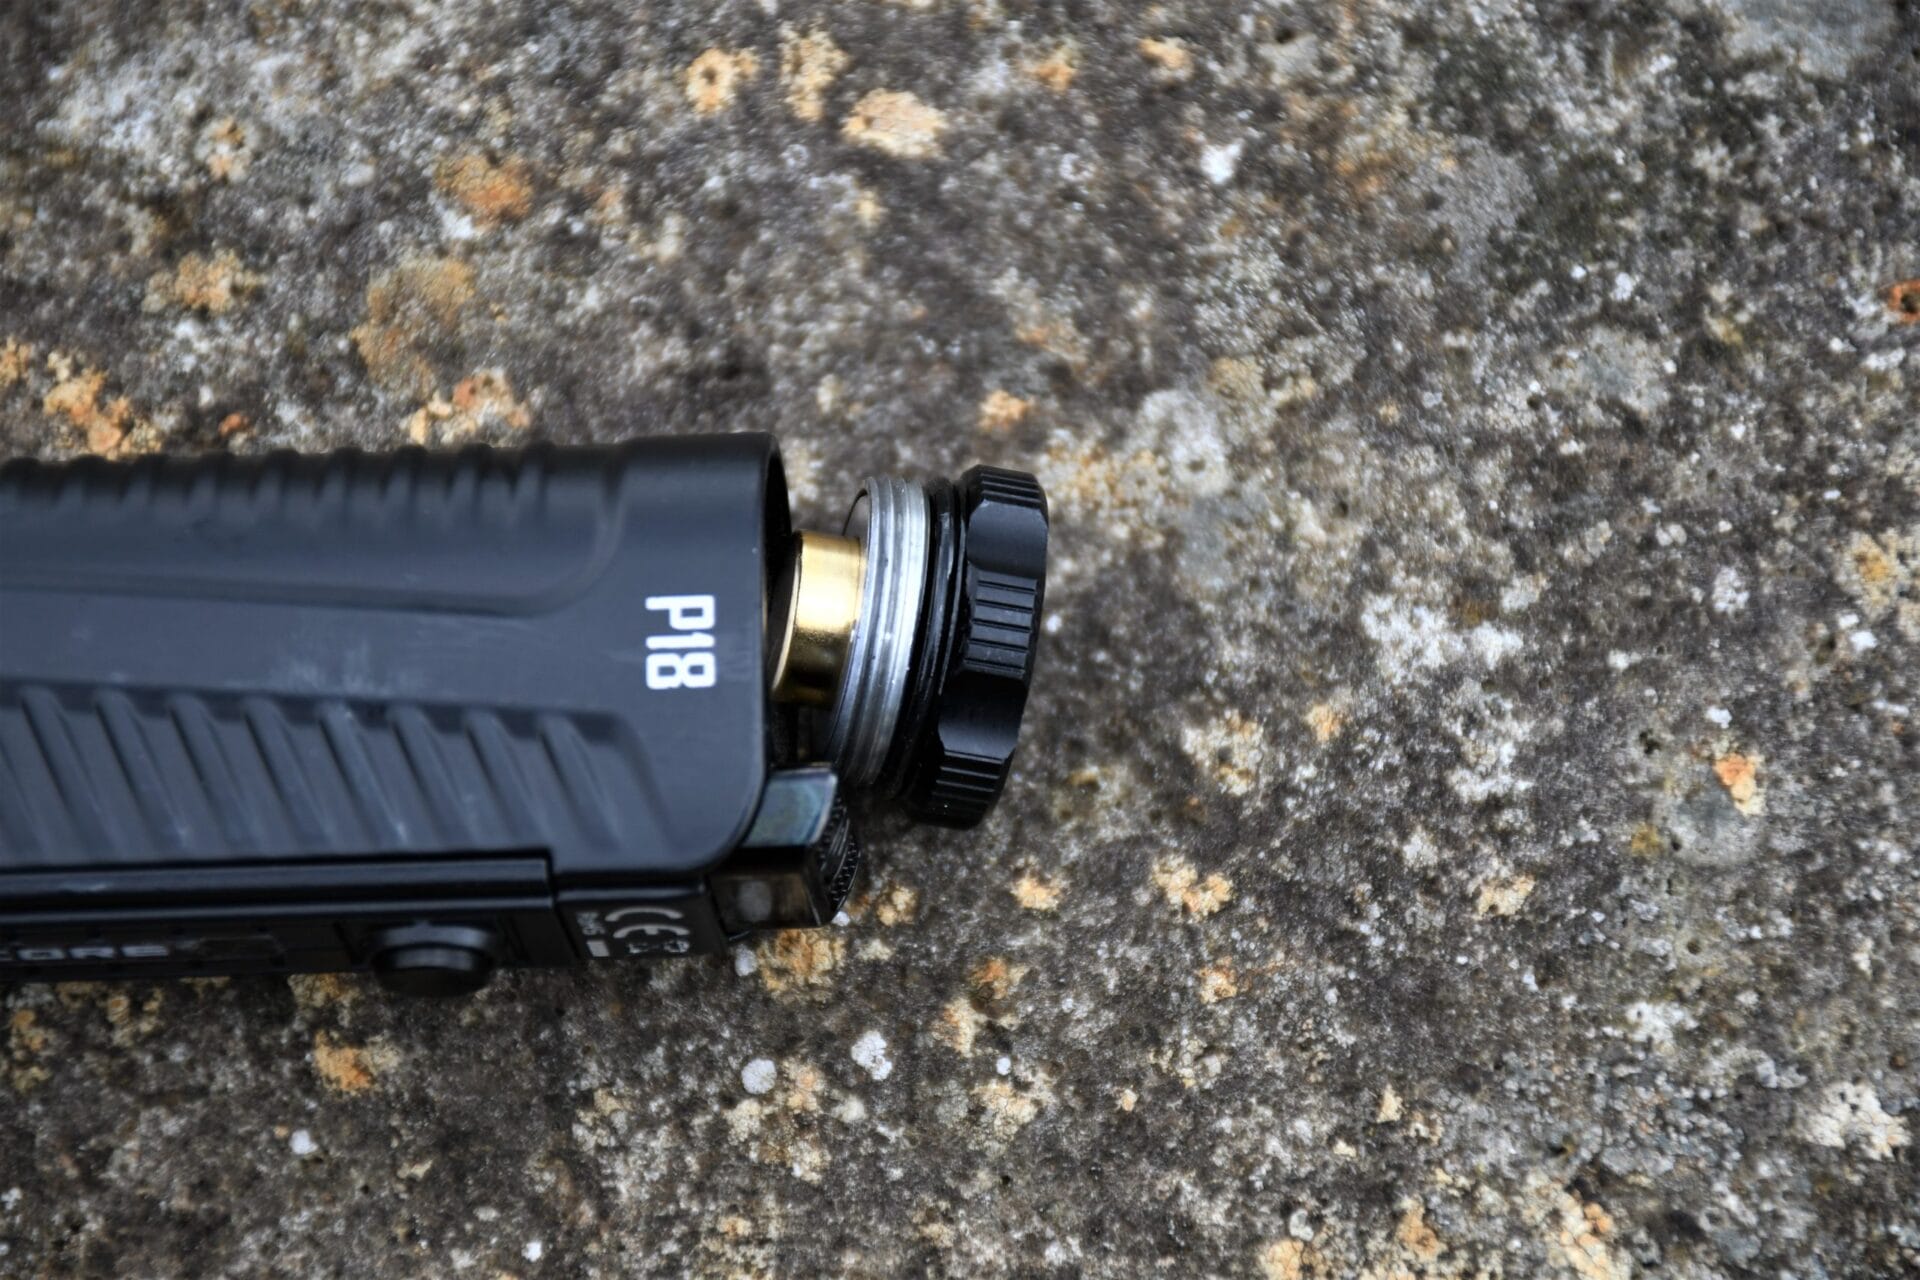
Inserting the Battery.
Just above the tail switch, the battery cover is found. This can be quite tricky to remove, so a pointed instrument or even a small enough coin can be used to aid the opening, as there is a groove cut into it for this very reason. When the battery is inserted, no rattling can be heard.
The battery length is limited to 67mm when using a protected 18650 battery. If you use a shorter battery, there will be a gap between the tail cap and the body and it may not function as intended.
Beam Shots.
Here are various beam shots that I took of the P18 on turbo, as well as the red auxiliary LED light.


Improvements and Suggestions.
Nitecore have produced a solid, compact flashlight that gives other tactical lights a run for their money. However, there are some minor aspects that could be improved. For example, if a more aggressive bezel was included, you would have an excellent self-defence tool in the palm of your hand. Also, if the P18 was fully waterproof (IPX-8), you wouldn’t worry about dropping it in water, which would make it even more durable. Apart from those minor things, I feel that the P18 has certainly raised the bar, as far as tactical lights are concerned.
If you want the Nitecore P18 Tactical Flashlight for yourself, it’s available for purchase only on Amazon and on the Notecore website. The RRP for this product is £94.09.
Product sample provided by Nitecore in exchange for a detailed, unbiased review.
Thank you for taking the time to read my post. If you’d like to add a comment or thought on this post, please use the section below. I can also be contacted via the online contact form. Please subscribe for the latest reviews, news, and discounts. Please follow My Helpful Hints on Twitter, Instagram & Facebook too!