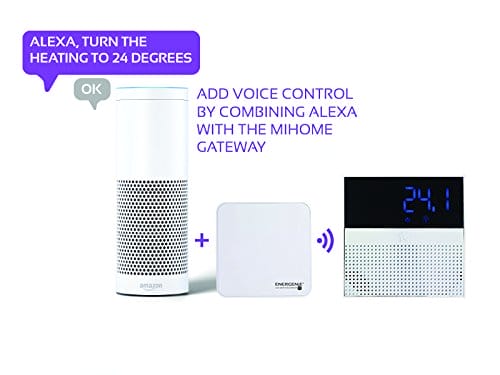
The Energenie MiHome Thermostat is another great addition to the MiHome range from Energenie.
You’re able to control your heating using Amazon Alexa or the via Energenie MiHome App.
You can set up Geo Fencing and with unlimited timers, and this thermostat has built-in motion and humidity sensors.
The Energenie MiHome Thermostat is compatible with all boiler types which has a zero Volt thermostat connection.
Requires the MiHome Gateway to function (See my Gateway review).
Packaging and Contents.
The Energenie MiHome Thermostat comes very well packed in a frustration free packed cardboard sleeved box. The box measures 13.5cm x 12.5cm x 5.0cm and weighs 310G.

When you open your Energenie MiHome Thermostat box you’ll find: 1x Thermostat, 2x AA Batteries, 1x Wall Fixings, 1x English Written User Guide.

Energenie MiHome Thermostat.
The Energenie MiHome Thermostat is made from high quality moulded plastics, it’s White in colour with a Black LCD screen. The thermostat measures 10.0cm x 10.0cm x 2.5cm and weighs 130G.

The LCD screen measures 10.0cm x 4.0cm and features a large and easy to see display with blue LED symbols and numbers.
On the side there is some user control buttons, these are a Plus Button, Minus Button, Power Button, and an M Button.
Installation.
To use this thermostat, you need to ensure that you have a connected Energenie MiHome Gateway and have also installed the Energenie App.
To install the thermostat, you need to carry out the following (This work should only be carried out by someone qualified and competent)
- Remove the old thermostat, if it is necessary cut the power off in the installation area.
- Remove the back of the thermostat by inserting your finger into the opening and pulling back the panel connections box.
- Enter the connection cables to the boiler through the hole in the connections box.
- Screw the connections box to the wall, using either the fixings included, or if they are unsuitable for your wall material please use alternative fixings.
- Connect the boiler control wires to the W and COM terminals on the connections box.
- Insert the AA Batteries into the thermostat. An LED will flash 3 times, indicating correct insertion.
- Fit the thermostat to the connections box on the wall and your thermostat is now ready for use.
Pairing with the MiHome Gateway.
To pair the thermostat to your MiHome Gateway, press the M Button on the side of the unit and then follow the below instructions. Successful pairing will be indicated by the App or the MiHome server web portal by a message, and the flashing LED icon on the unit’s display. If the LED icon continues to flash, it could indicate that the MiHome Gateway is either offline or the range between the thermostat and MiHome Gateway needs to be reduced (Maximum distance is 30M in an open space environment).

Smartphone – Log into your MiHome account on the MiHome App. Select “Add a new device” from the menu and choose thermostat. Follow the on-screen pairing instructions.
Web Browser – Log into your MiHome account at mihome4u.co.uk. Select “Pair new device”, select thermostat and follow the on-screen pairing instructions.
Technical Specifications.
- Brand: Energenie
- Model: MiHome Thermostat
- Model Code: MIHO069
- EAN No: 5060166037062
- ASIN: B076NYGJWG
- Radio: 433MHz (Open Things)
- Receiving Range: 30M in open area; 15-20M Installed
- Rating: 220-240V ~ 50Hz
- Maximum Power: 62.5VA / 60
- Temperature Accuracy: ± 0.3°C
- Relays Rating: 2A, 30VDC & 0.5A, 125VAC
- RX Frequency: 433,9 MHz
- Compliance: CE, RoHS
Conclusion.
I really like the Energenie product range, it’s simple to set up and installation is a breeze. Look out for more Energenie MiHome product reviews over the next couple of weeks too. This thermostat is simple to install and use in a matter of minutes. I really like the LED control panel on the front, it looks modern.
If you’d like to purchase this item, please check out the purchasing options below. The RRP for this item is £76.95.
Amazon Best Option | eBay |
Product sample provided by Energenie in exchange for a detailed, unbiased review.
Thank you for taking the time to read my post. If you’d like to add a comment or thought on this post, please use the comments section below. I can also be contacted via the online contact form. Keep up to date with the latest news on social media.
