
Product photography, two words that put the fear into many small businesses. But can you do half-decent images yourself? What equipment do you need? How to take a product image? All will be (well hopefully) explained in this post.
Before I start, I need to make it clear I’m not a professional, I’m sure there’s plenty of professional photographers out there who would disagree with my methods, tell me I’m wrong. But they have the advantage of being a professional and the equipment, skills to match.
My post is to help those that have no idea, may take unpleasant product photographs, want to improve sales, come across more professional. Most importantly, my post aims to improve your product photography on a budget.
Why bother? You may have the most beautiful hand-crafted product, but without a half-decent image, you don’t have a beautiful hand-crafted product for sale. You in fact have a shoddy looking product. That’s what your potential buyer sees.
‘A picture is worth a thousand words’, don’t make them bad words. The first thing a potential buyer sees, your photo. That’s before bothering to click through and read about your product. If you turn them off at this stage, you won’t sell!
I’ve seen some beautiful products from small business sellers across my social media channels, but they lack a decent photo to match. Consequently, these sellers usually keep plugging away trying to sell their item, often left wondering why no one purchases their prized work. They then presume it’s a matter of price and then reduce their item purchase cost and eventually sell an item for far less than the actual value.
Lighting.
Lighting is your best friend, but also your enemy when taking photographs, light needs to be bright (as close to natural sunlight as possible) and needs to be at the right angle. Get it right and you have a beautiful image. Get it wrong and you have a terrible image.
Light needs to come from above and toward the product, don’t light up your image toward your camera, you’ll get a whiteout finish and your camera won’t be able to capture the image. The same effect when someone shines a torch into your eyes, you can’t see. But if you hold the torch and use it as intended, you can see. This is how your camera works.
Most modern lighting kits come with a compact fluorescent light (CFL) bulb. This I would highly suggest you upgrade immediately to a LED version. I did this and was amazed with the difference. The old CFL light would struggle to provide the right lighting temperature and would slightly flicker. I highly suggest an LED upgrade.
But what is temperature? When we think of temperature we think of heat/cool. But temperature is also used to describe lighting warmth and lighting is measured in degrees of Kelvin (K). Kelvin is the internationally recognised unit of thermodynamic temperature. No matter where you are in the world, the Kelvin temperature is recognised.
 The higher the Kelvin number the cooler (whiter) the light looks. Most photographic lamps are in the 5500K/6000K range. This replicates natural daylight and is best used for product photography.
Get the lighting right, you’re 90% of the way creating that beautiful image.
Props.
This is a personal preference, but for me photo props for product photography should be avoided. It adds too much clutter to an image and draws a potential buyer away from your product. You want no distractions and for your product to be the main focal point.
Adding a prop could lead to a customer thinking they’ll be getting more for their money, despite a written product description written by yourself, it’s what is in the picture that the buyer believes they’ll be receiving. Some don’t bother to read a product description, so you’re setting yourself up for trouble by effectively advertising extras with their purchase.
The only time photo props should be used is for marketing. Take some photos with props if you intend to use them on your social media platforms. But, never use a photo prop image as a main product image. Keep it simple, clean, are as non-distracting as possible.
Background Colour.
The best background colour to shoot your product photos is by using a plain white background. This is a proven method of providing a distraction-free product image. Also, it’s what Google prefers too. Google loves a clean image and those with a plain white background get a higher search position. Fact!
I use a plain PVC white backdrop, this backdrop is double sided, one side has a high gloss finish and the other has a matte finish. I prefer the matte side as it absorbs the light better, the glossy side produces too much glare for my liking. But if you play around a bit you can produce beautiful images using both sides.
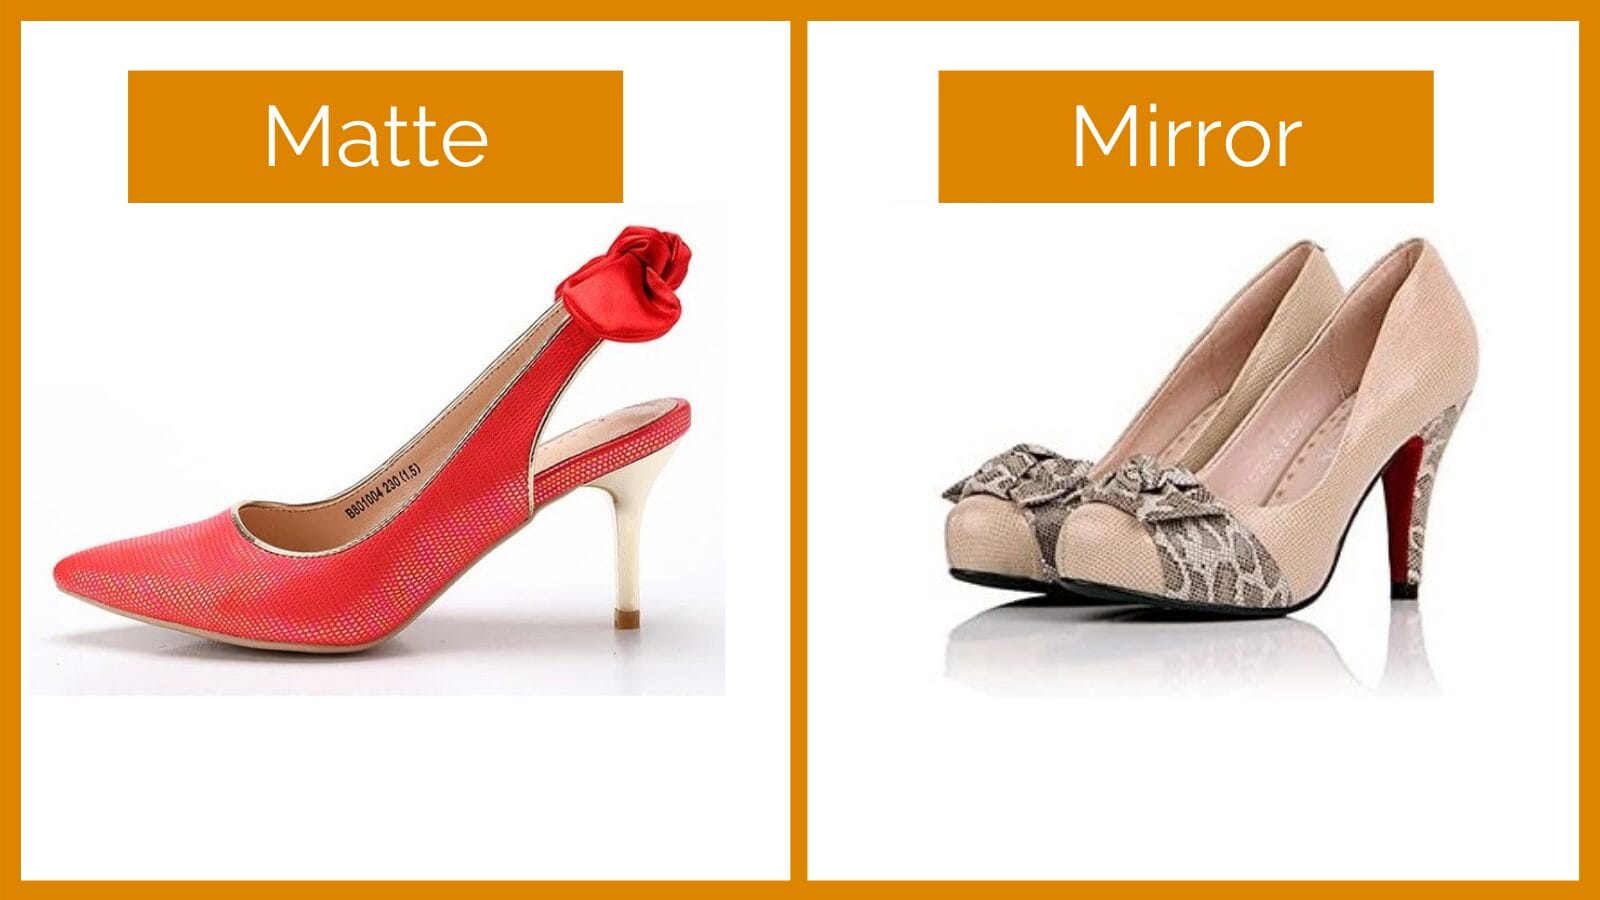
As you can see, you get different finishes, but still on a plain white background.
Soft Box.
A simple search on Amazon for the word photobox and you’ll come across thousands of products, all cheap and will work perfectly fine for what they intend to be used for. But they’re very limiting in terms of product size. If you only plan on selling small items, then this avenue is perfect for you.
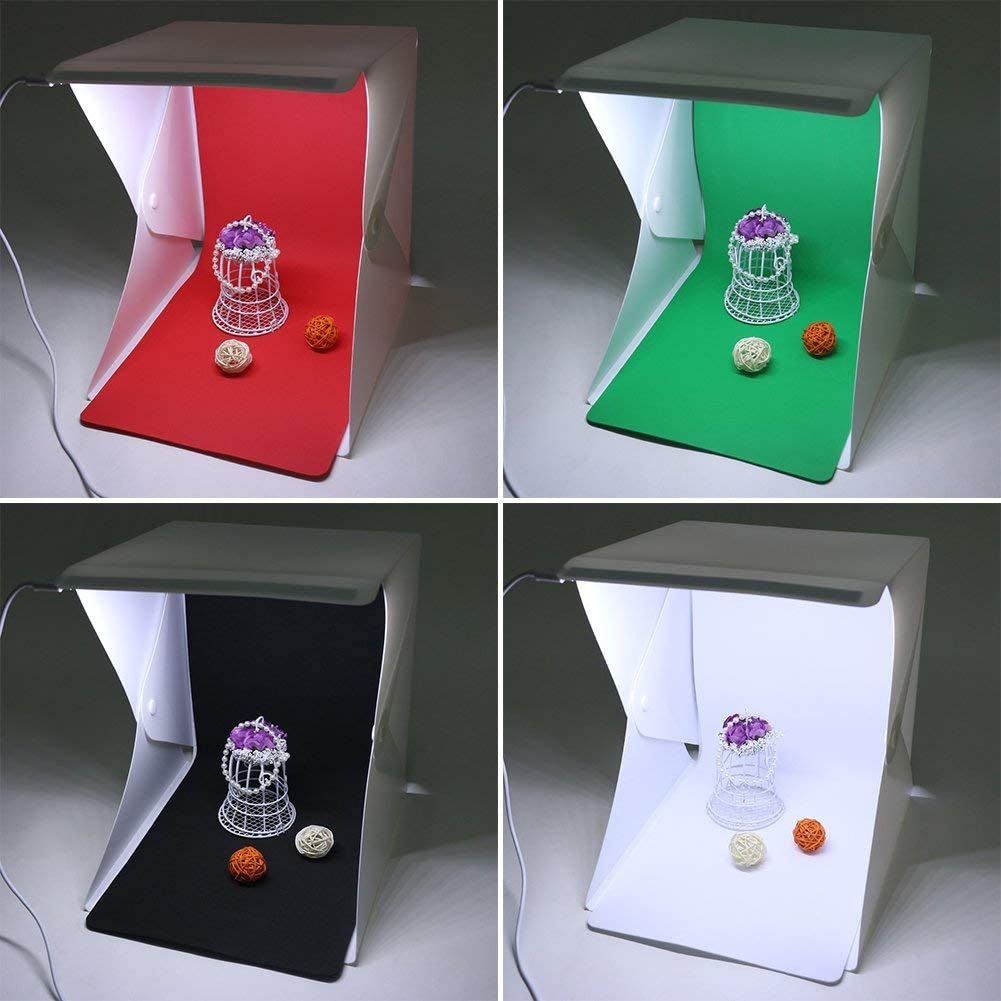
These pop-up lighting setups include a LED light and produce an OK image, they’re certainly better than having nothing at all. But another issue aside from the product size restriction is the light harshness. They produce images that provide too much light onto a product and you’ll have images with high light reflections and produce an image that changes the correct colour of your product. This could cause you some issues as customers won’t be happy to receive a product wrongly advertised as a different colour.
Yes you can of course add a little disclaimer saying to allow some colour differences of the actual product, but the customer is always right, and with most selling platforms favouring the buyers opinion, you’ll be inundated with returns that you must accept. This will not only cost you money, but also damage your selling reputation.
The Alternative.
Invest in a PVC backdrop with a stand, telescopic lights, an umbrella and possibly a cheap tripod (if you prefer this). This is relatively cheap and will ensure that you can capture any product, of any size and still produce beautiful looking images. Most setups include everything that you need to get going, prices range from £60-£150 depending on what it is you require.
This initial cost is a small cost that will provide you a payback in terms of sales. Certainly, in comparison to poor quality images and no sales.
Remember, attract the buyer, get the sale. Put off the buyer, get no sale!
I purchased the below type of setup.
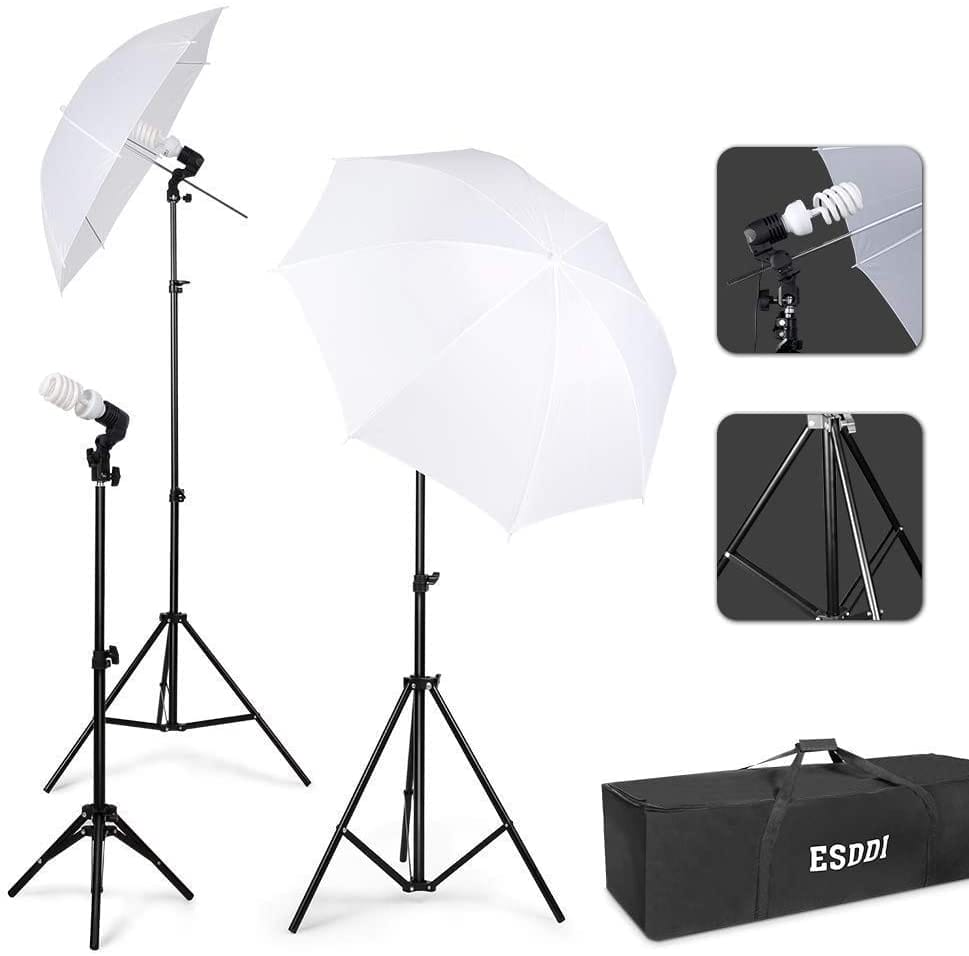
I got lucky and got the above setup for just £18.00 on Amazon. Sometimes you get lucky and a bargain comes along at the right time. Search on Amazon and you’ll find similar looking setups costing around £50.00.
Couple with this setup with my PVC backdrop and you get the perfect setup to produce decent product images.
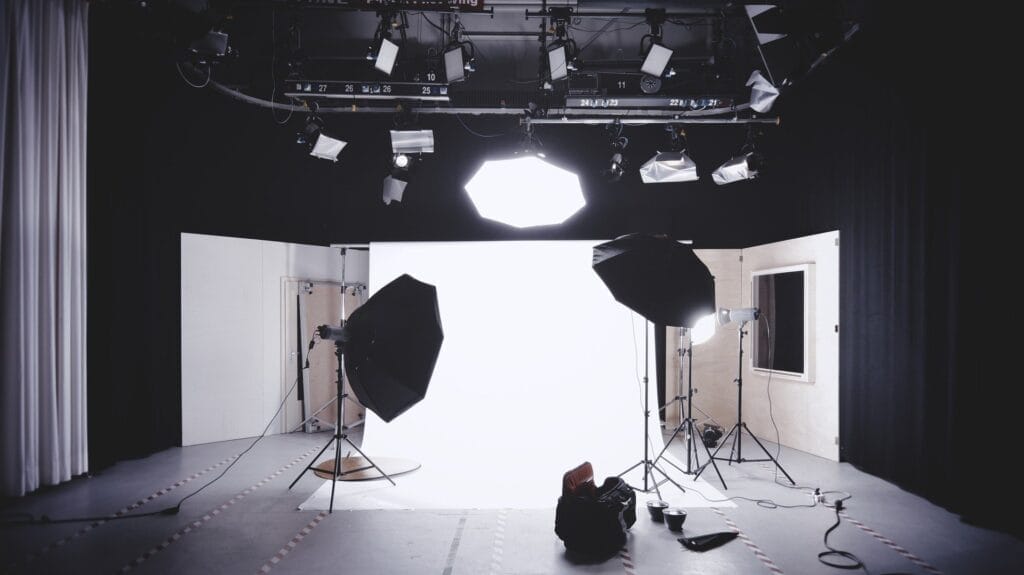
My Setup.
This is how I setup my images. The two small LED lights are another review item, check them out here. They’re very standard type lights and can be found just about anywhere, they feature a USB plug and I use a powerbank to power them.
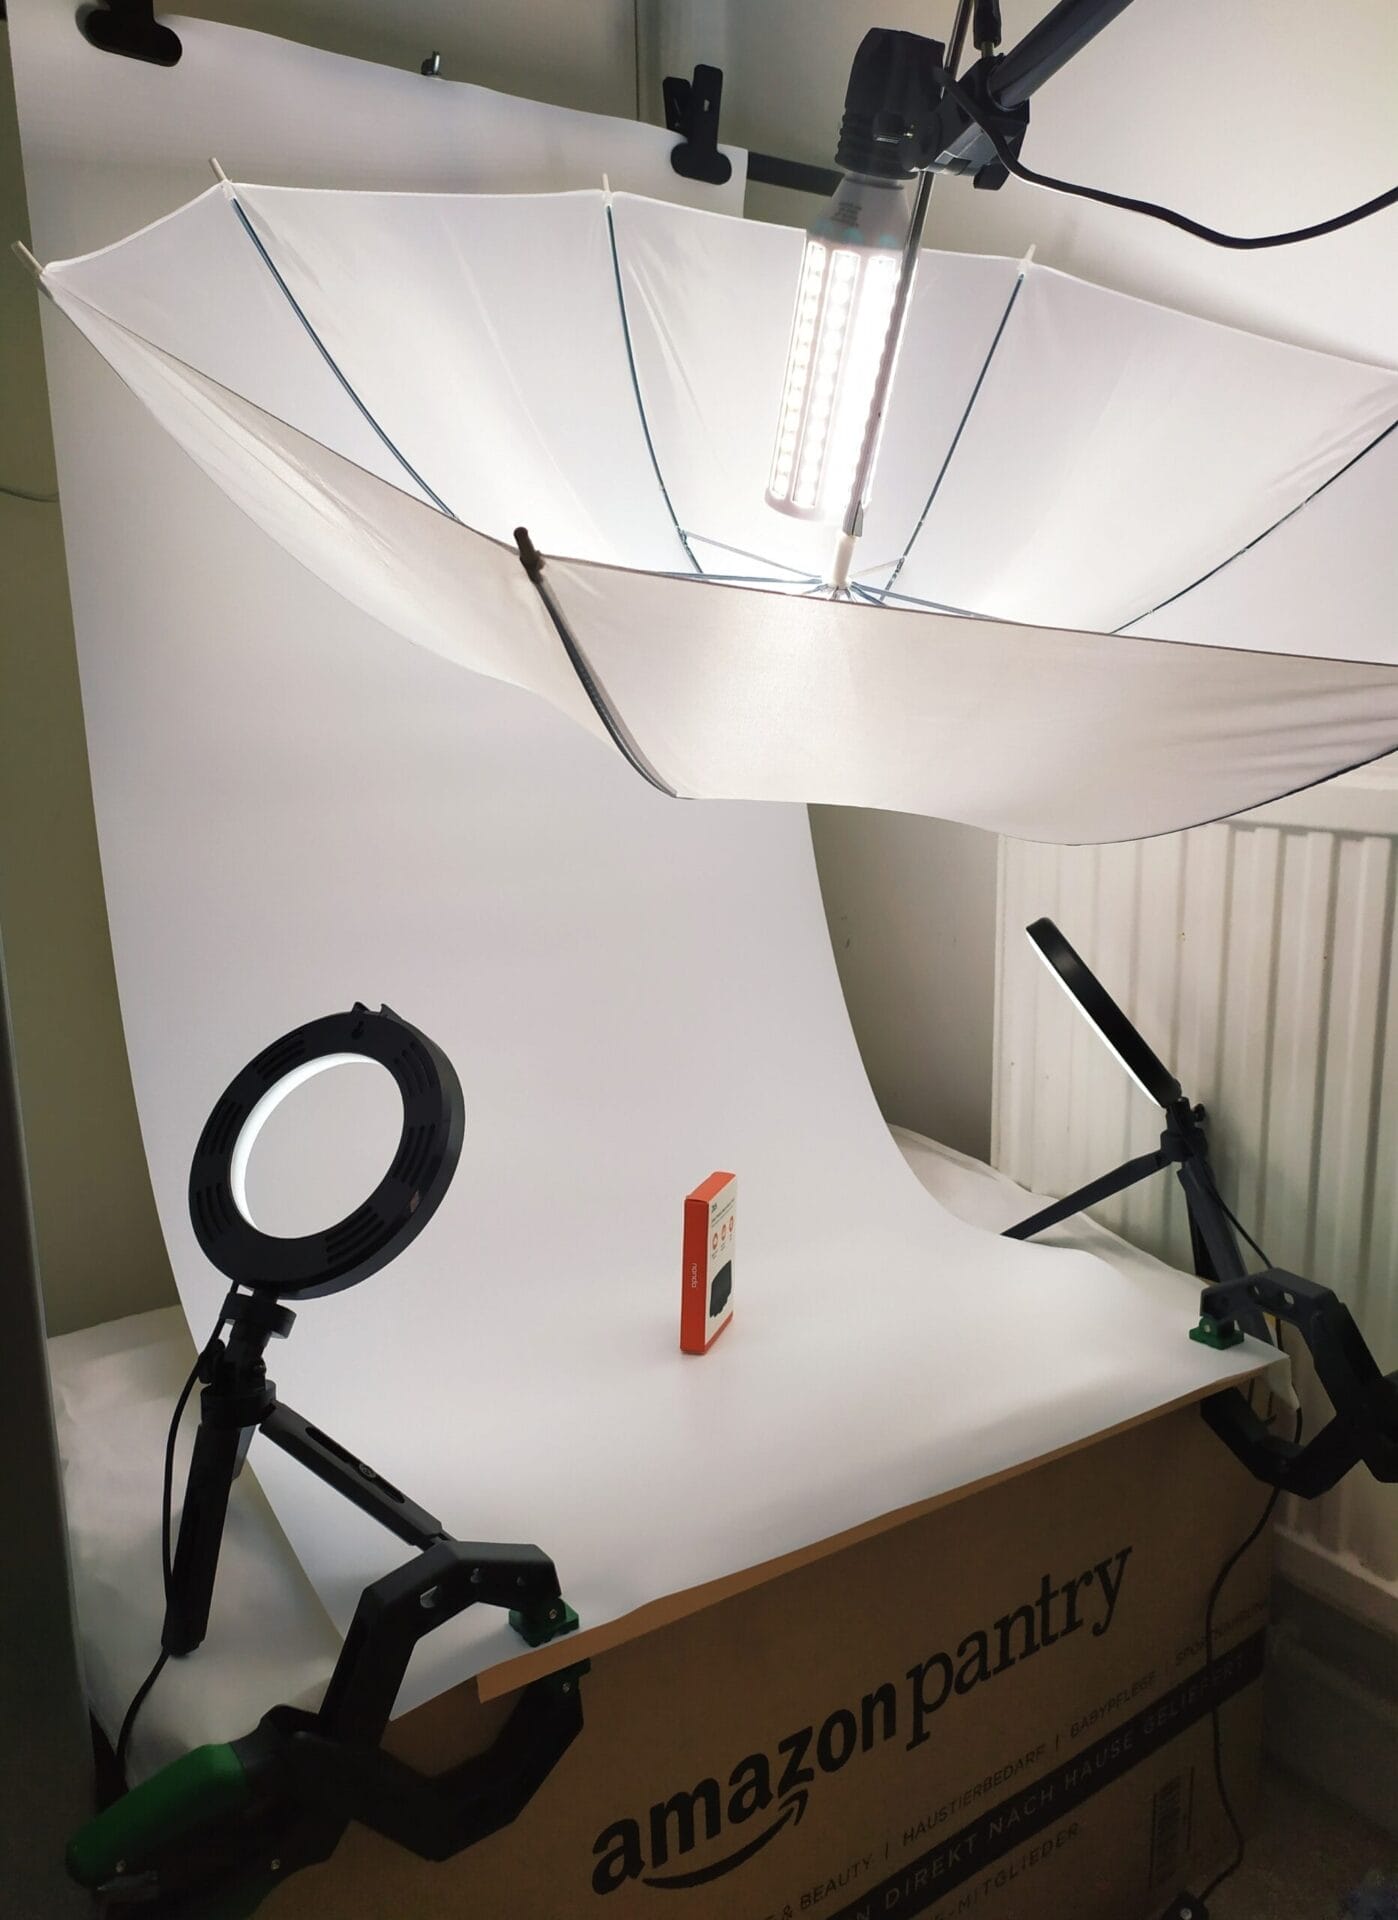
Notice the height? This is vitally important; the right angle can make all the difference. Please do not take images with the product sprawled out on a floor. This looks very amateur and it’s what your neighbour does to sell some stuff on Facebook Marketplace. You’re not that type of seller!
I use a cardboard box to get a height of around 50.0cm (ideal for me to sit, point and click), this type of height allows you to take an image like at eye-level. My piece of wood allows me to clamp my PVC backdrop and produce the perfect ‘curve’ that allows light to fully light up the background without producing unnecessary shadows. The above image shows my typical setup, this will produce the below photo.
Camera.
I don’t use any specialist equipment, in fact I use my Xiaomi Redmi Note 7 phone to take my images. Most modern smartphones have the camera capabilities to take a quality product photo. I would suggest a smartphone camera specification of 20MP or above for better clarity.
You can spend thousands on the latest digital single-lens reflex (DSLR) camera, but it’s not needed. But, if you have this type of camera, then by all means use it. It will produce high-quality images and will outperform a smartphone.
But it’s not needed to produce your product photography images.
Some users prefer to use a tripod, I rarely use a tripod (too lazy) and prefer to freestyle my images. Tripods are available very cheaply and will be adequate for what you need. In fact I’ve reviewed a few on this website.
How to use a Smartphone.
As mentioned above I use a Smartphone to capture my product images. But it does require some manual input to capture images.
Clean your smartphone camera lens before photographing, use a soft microfibre cloth, you’ll be surprised the difference this makes.
The first to master is focus, modern smartphones feature automatic focus, and for most of the time this is perfectly adequate. But you’ll need to learn to manually focus on your product. Luckily, this is a simple as tapping the screen on the product itself, you might see your screen refocus and blur out more of the background, this is what you want to happen. The main focal point needs to be the product. Be mindful that some devices try and automatically refocus again, so you’ll need to touch the screen onto the product for every image.
The second thing you need to learn is how to use white balance on your device. Most modern devices feature automatic white balance, this is great for everyday images. But for product images you’ll need to manually balance this yourself.
Check your own device’s user guide if you’re unsure, but most common devices use the same method of manually adjusting white balance. To adjust press and hold on the screen and swipe upward to brighten the image, swipe downward to darken the image. Some phones might swipe to the right to brighten and left to darken.
Another feature I highly recommend using is gridlines. This helps you to align your image perfectly.
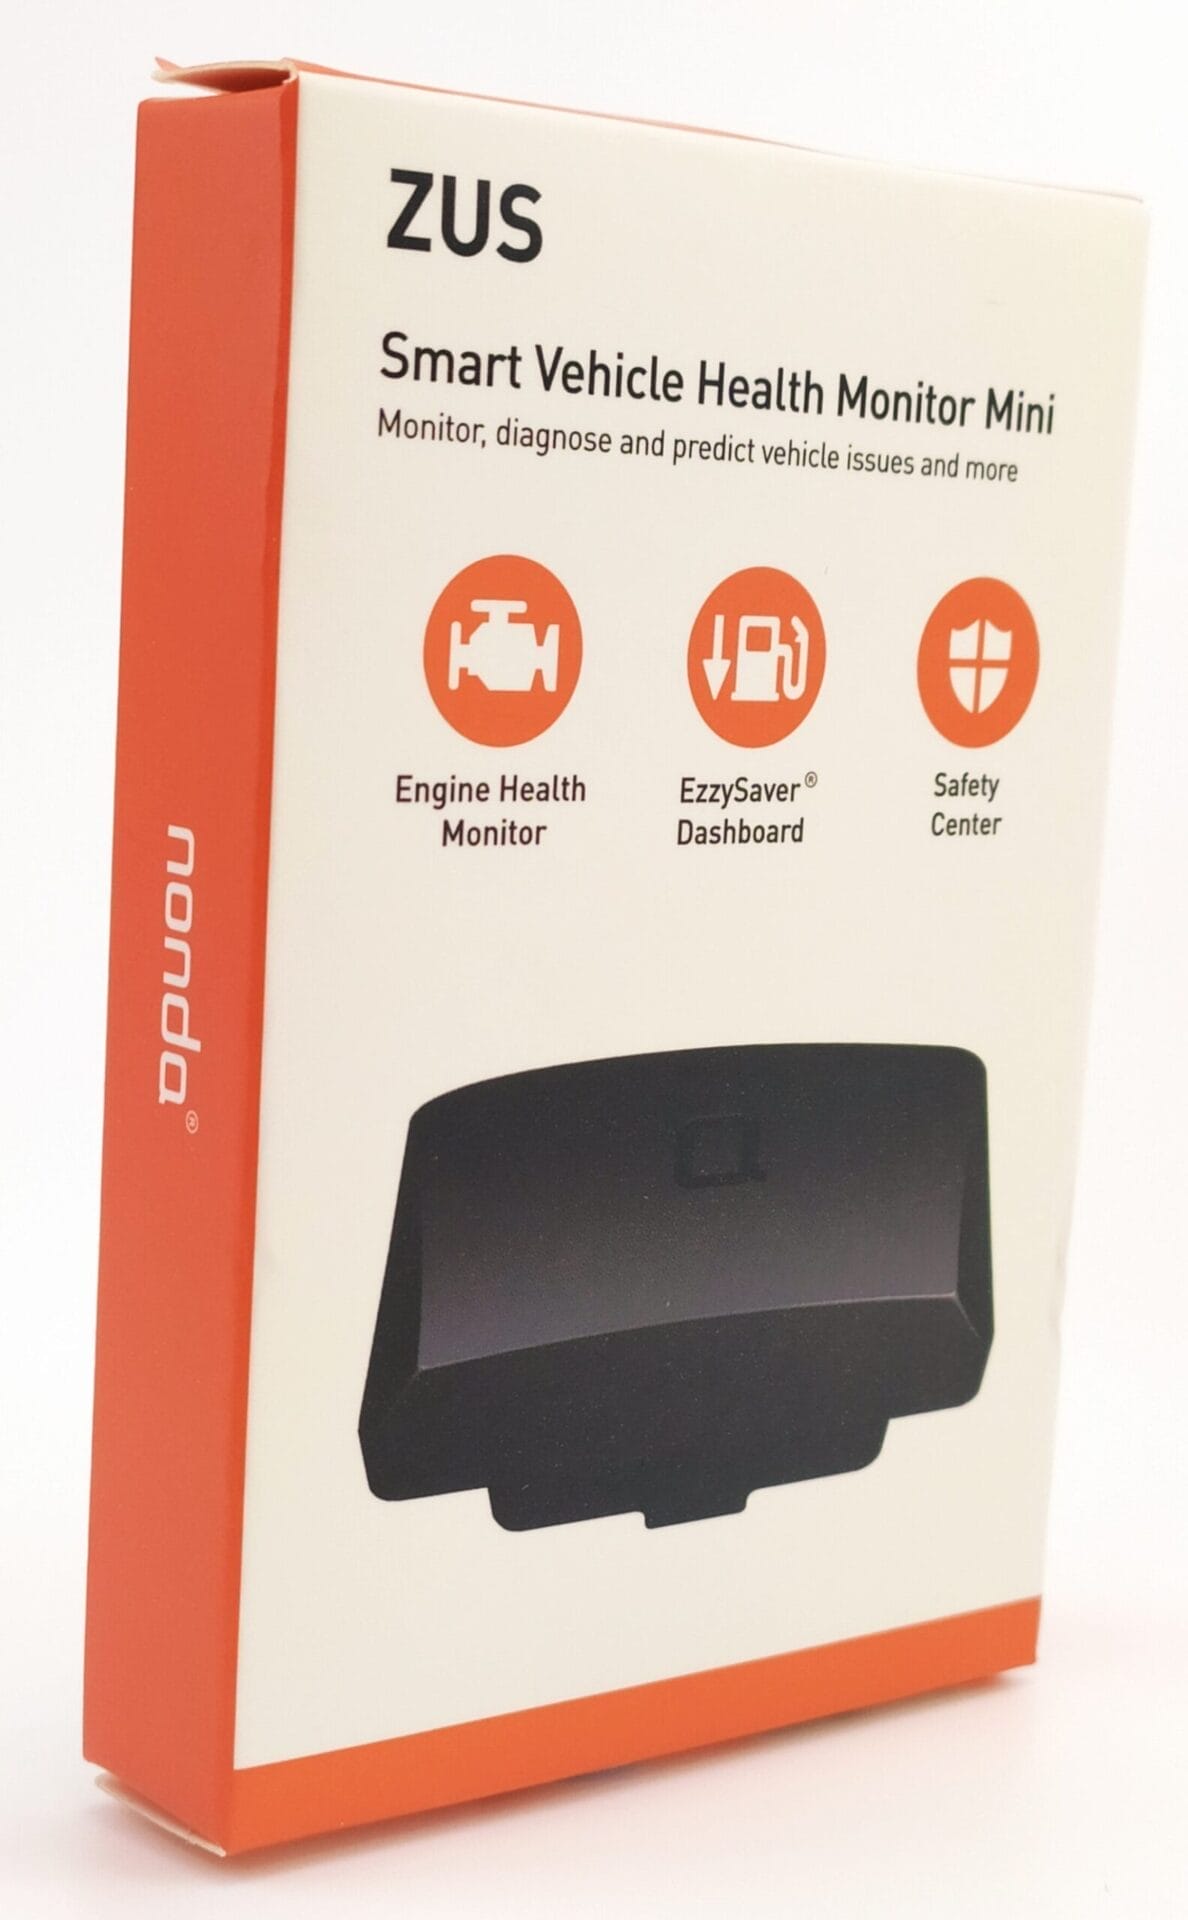
Going Vivid.
I also use the vivid contrast setting on my photo’s, this produces a warmer colour to the product without changing the plain white background. I find by changing the white balance the product can lose its actual colour. So, by using the vivid function along with white balance adjustments you can get the perfect white background shot, complete with actual colour of the product.
The above image is the perfect example of why to use vivid camera settings. Without it, the yellow part of the box would fade to a much light shade of yellow. But by using this feature the colour stays true and enables me to still get my perfectly white background.
Another thing to consider is zoom shots, most modern smartphones can zoom in on an object, but the more you zoom the more clarity is lost and pictures becomes blurry. But you can use a magnifying glass without hindering your photos.
I also don’t use flash either, if you have adequate lighting, it’s not needed.
Cropping.
You’ve taken the perfect image, so now what. Before you go uploading your latest products, you’ll need to crop some of the image. As discussed earlier your focus should be on the product itself, there’s no point in uploading a tiny image of your image. Most smartphones allow you to crop and image. For desktop I still use my firm favourite programme of paint. It may be old, but it works perfectly well for cropping an image on a desktop.
You shouldn’t need to edit anything else with the image if you’ve taken the image to a high enough standard. But you can edit photo’s using other software, but these usually cost money and the more your edit, the quality becomes more effected. But what if you want to edit and image for use on your social media marketing campaigns?
Background Removal.
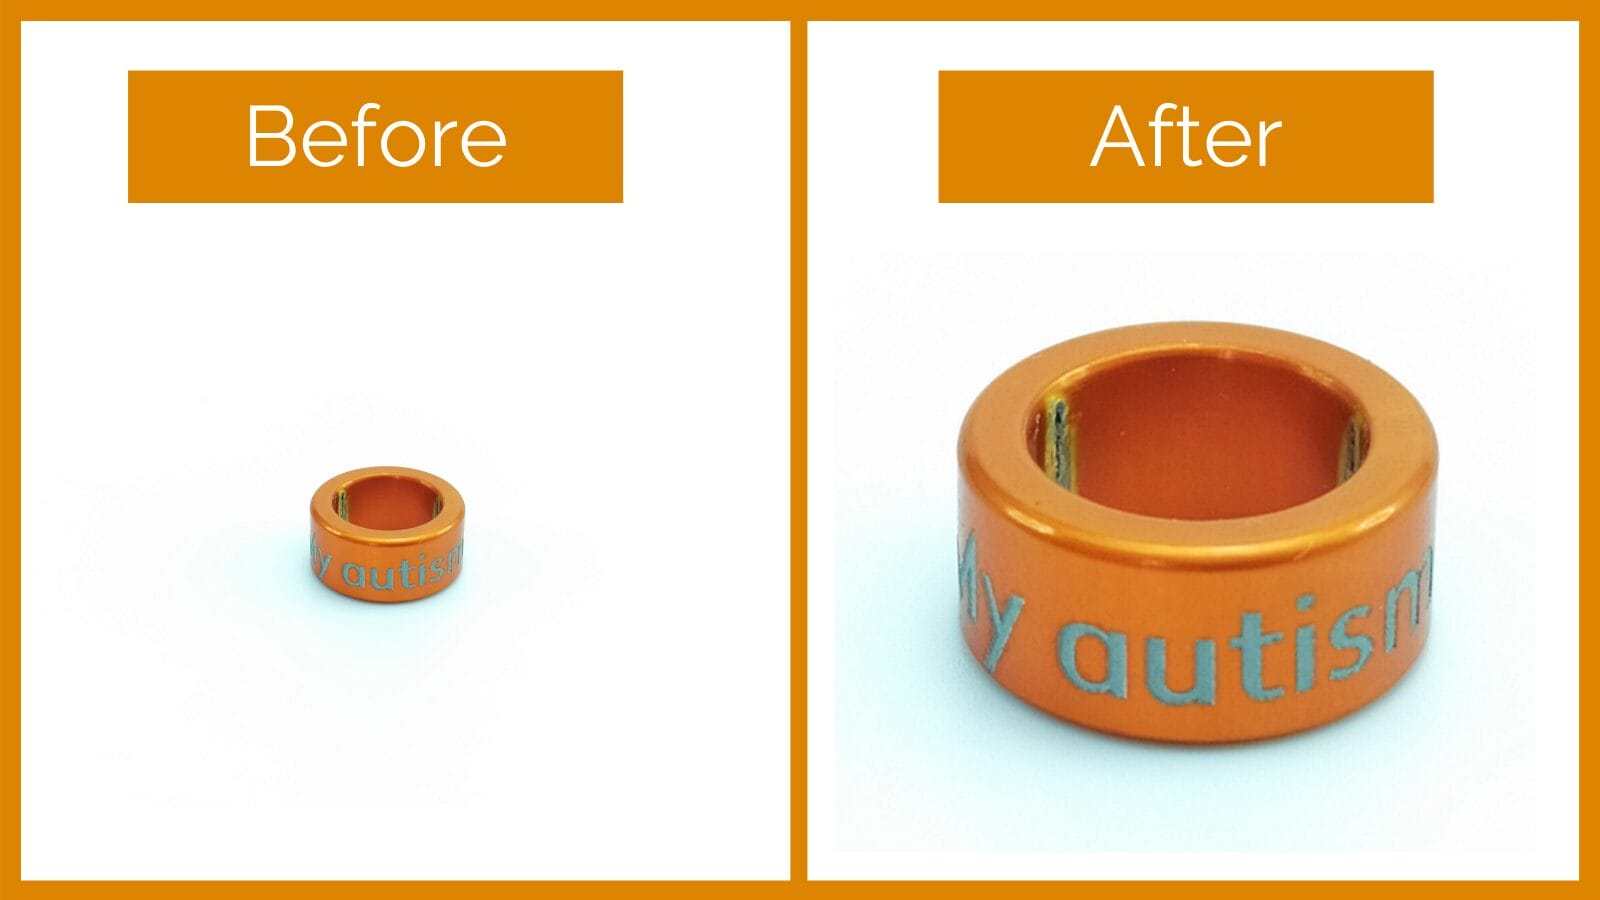
You have the perfect stock looking product image, but now you want to add your image to an orange background for example to use on your social media or marketing campaigns.
What is background removal? Quite simply it’s the removal of everything in the background and will leave a transparent finish of your focal object, such as the product itself. Once a background is removed you can paste the object onto any colour background without having to use the dreaded white box that comes with it.
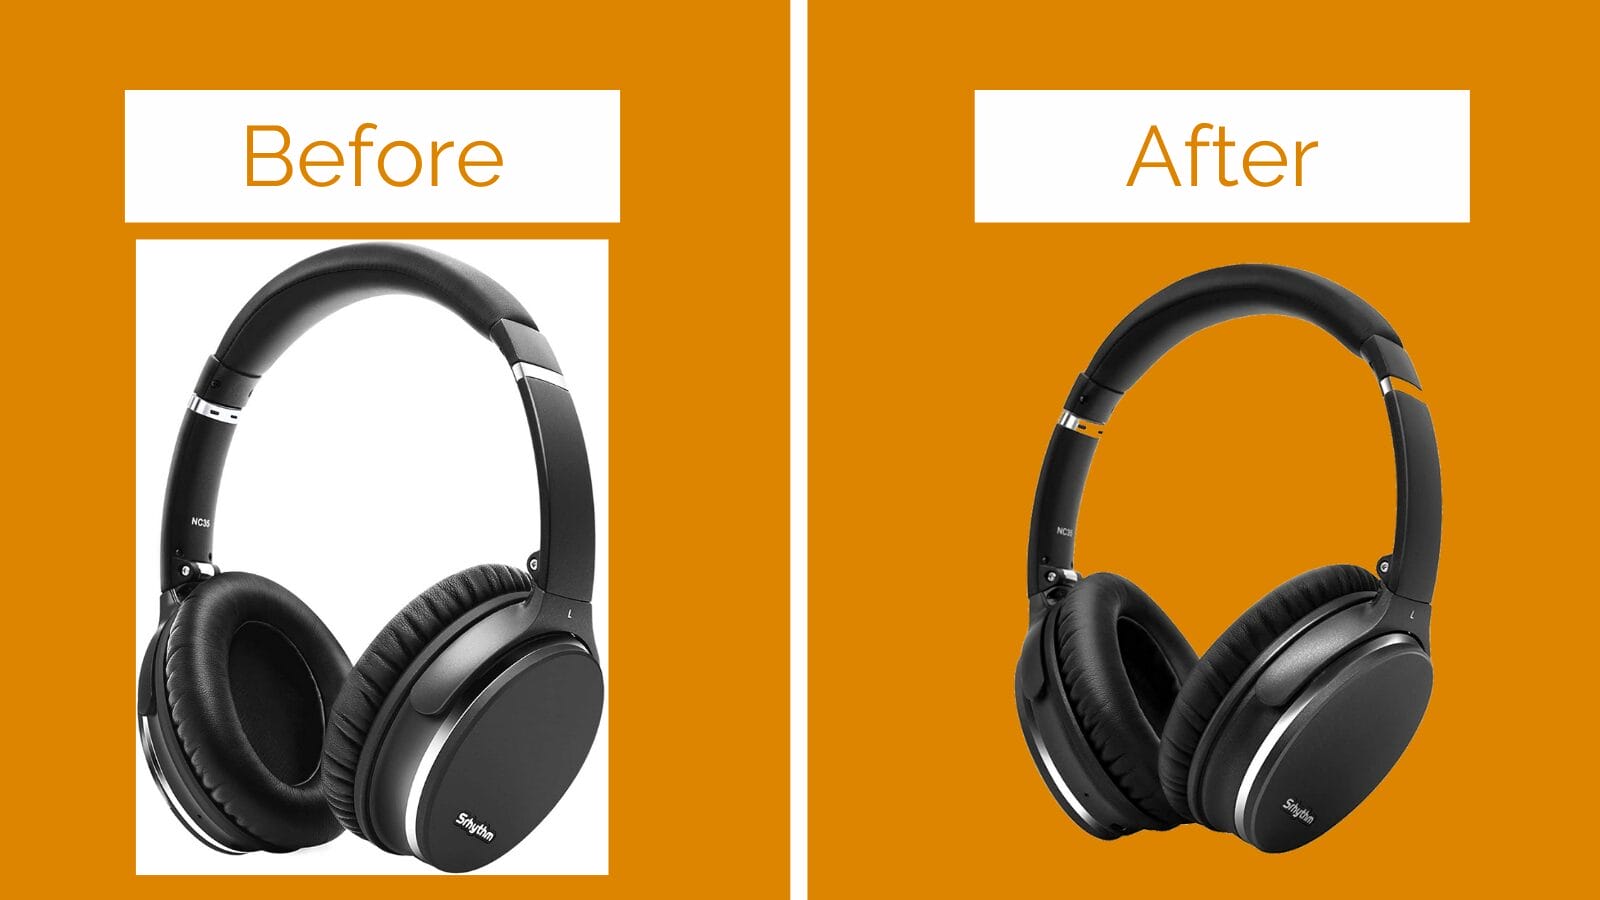
You could learn to use Adobe Photoshop and remove backgrounds. This takes some practice and will cost you a subscription fee. But it can be done for free. Yes Free!
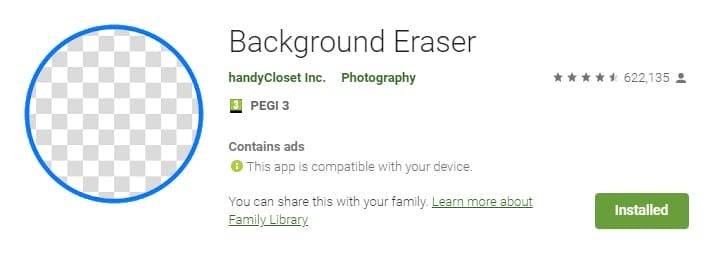
Go to your app store on your device and search for a background removal app, most are free but will require you to watch some adverts. I use an app called Background Eraser by handyCloset Inc.
This app features an automatic removal tool, easy to use screen on screen type background removal. Once completed you get your background removed image and can save it to your device. But now what? Canva. The world-famous graphic design software that’s used by almost everyone. For the most part it’s free, I’ve never seen the benefit of upgrading to the premium model. The free version is more than enough for me!
With Canva you can upload transparent images onto your chosen background colour. Then publish, save and you’re now creating photographic marketing material like a boss.
Alternative Text.
What is Alternative text, or Alt text in short form? This basically allows visually impaired technology users to visualise your images. Not everyone can see your images, so you’ll need to describe them to your visitors. This is an area of which I struggle with the most, I’m autistic and find describing an image in written form exceedingly difficult. But, it’s particularly important.
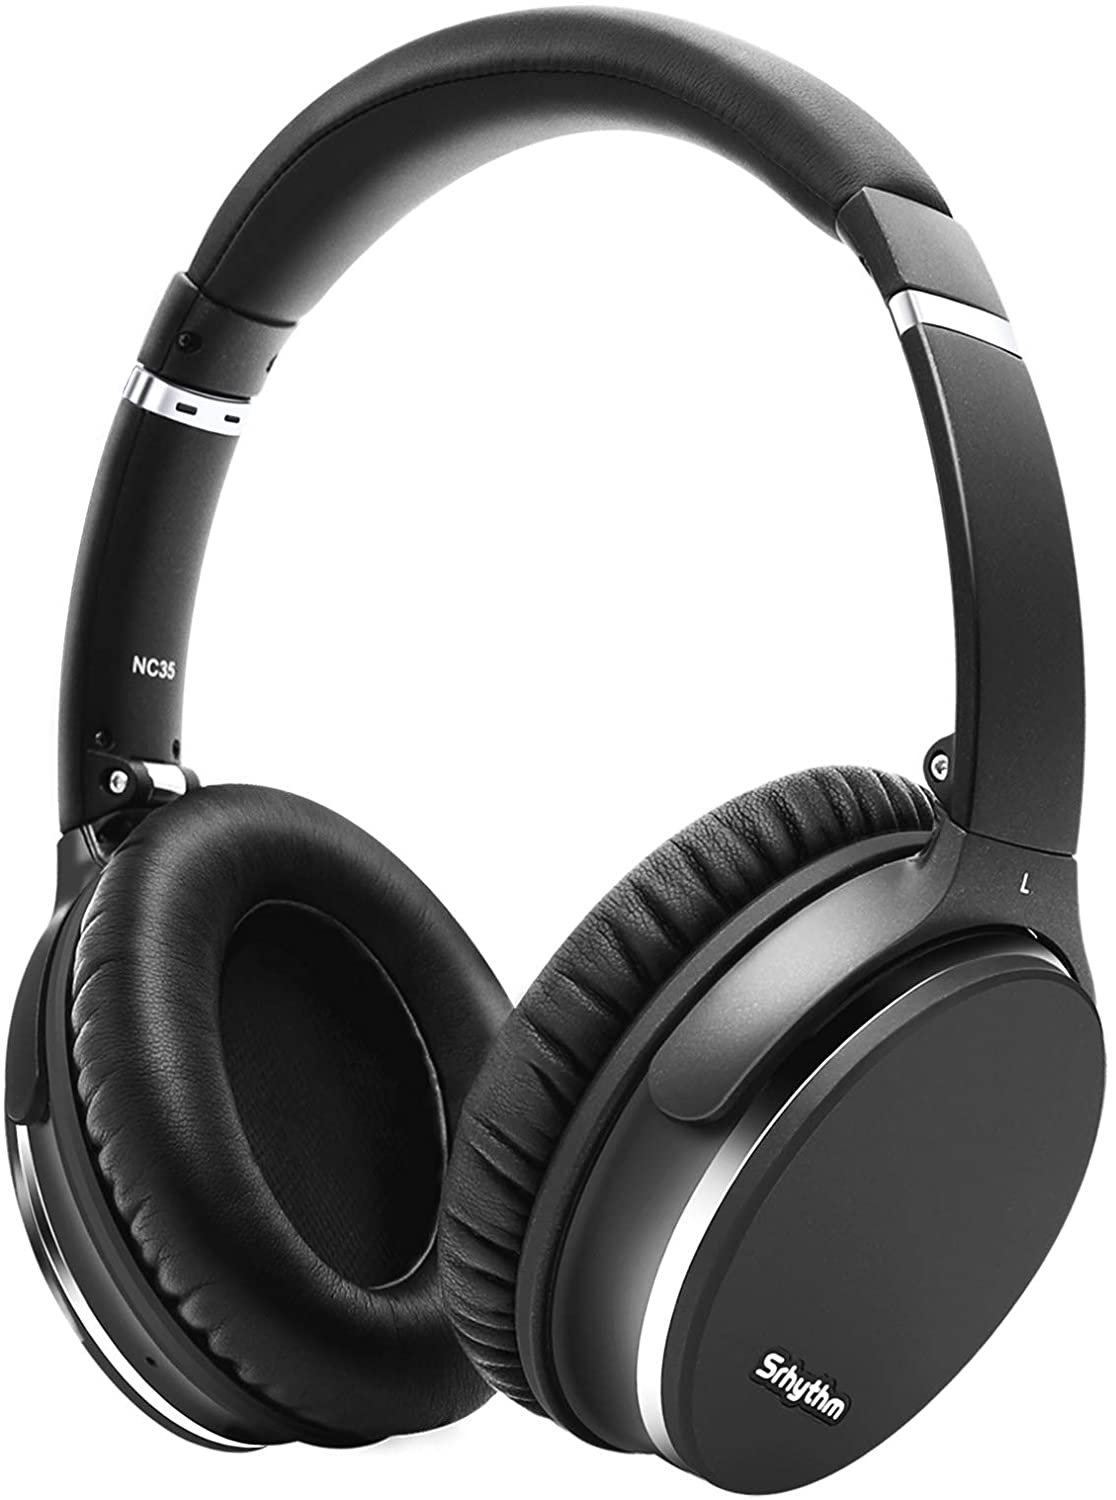
Whenever you add images to blogs, website, social media you need to describe what the image is. An example Alt text for the below image would be…
Image shows a pair of black noise cancelling headphones with chrome banding on the ear cups. The headphones are positioned in an upward position. The logo of Srhythm is on the lower section of the right-hand side ear cup.
Conclusion.
I hope you found this post useful. Product photography can be as easy or difficult as you make it. As I said in the beginning, I’m no expert, I’ve done all these tips through hit and miss and ended up with something that I think is to an OK standard.
I’m sure a photographer would laugh at my setup and advice, but it works for me.
Thank you for taking the time to read my post. If you’d like to add a comment or thought on this post, please use the section below. I can also be contacted via the online contact form. Please subscribe for the latest reviews, news, and discounts. Please follow My Helpful Hints on Twitter, Instagram & Facebook too!